
This post may contain affiliate links, please see our privacy policy for details.
If you’ve been craving a cozy baking project, croissants are it—buttery layers, crisp edges, and that soft, honeycomb center. This tutorial walks you through each step with photos and real-world tips, so you get visible layers and a tender bite.
We’ll cover the cues that matter (how the dough should feel, how the butter should bend, and what “proofed and puffy” actually looks like), plus make-ahead and freezing for weekend brunch or holiday mornings.

Here is the deal, they are actually very straight forward and technically not hard at all. If you make bread you can make these, but you do need time (think like the whole weekend or you know, fourteen hours or so) and patience, which I have neither of. Still kind of amazed I actually made them, but like I said I have been wanting to forever. Ok well, that and I needed some of the dough for a project.
Oh and I should mention, I made not only one batch of croissant, I actually made a total of three. Yeah, three. One for now and two to freeze and save for Thanksgiving and Christmas. I figured if I was making them, I might as well just make a ton. My cousins are coming for Christmas again this year (so excited!!) and I can guarantee we will have Thanksgiving guests too…..
Enter random kids who my brothers find on the hill. It’s just so much fun!
Not.
Anyway, I am stocked with croissants. Over fifty are sitting in my freezer right now. It’s kind of awesome.
Ok enough, let’s get on with it!
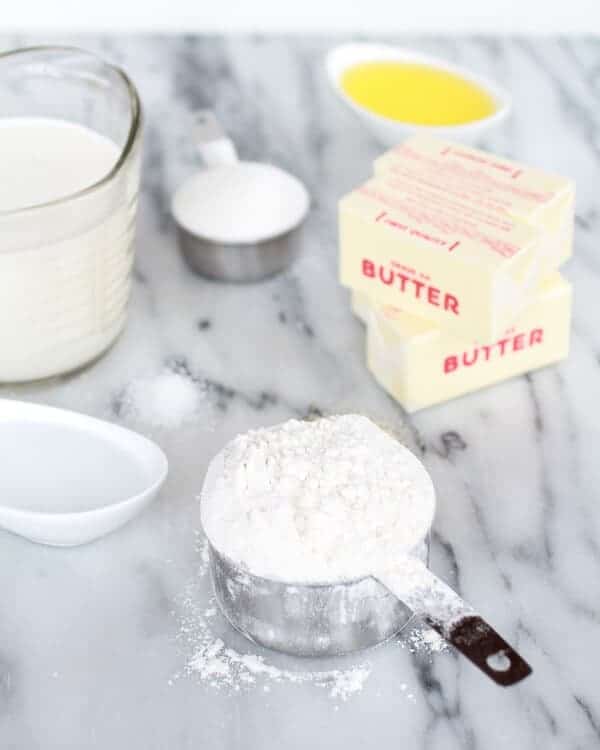
Gather your ingredients.
Start out pretty simple. Flour, cold milk, hot water, yeast, sugar, salt and lots of butter!
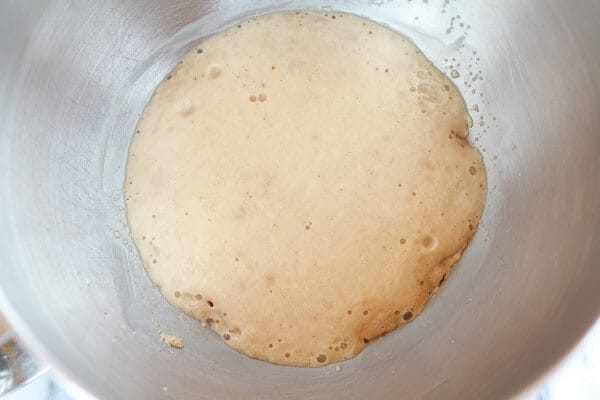
Start by activating the yeast. Combine the warm water with the sugar and yeast. Let sit for 10 minutes until foamy. It should smell bread-like.
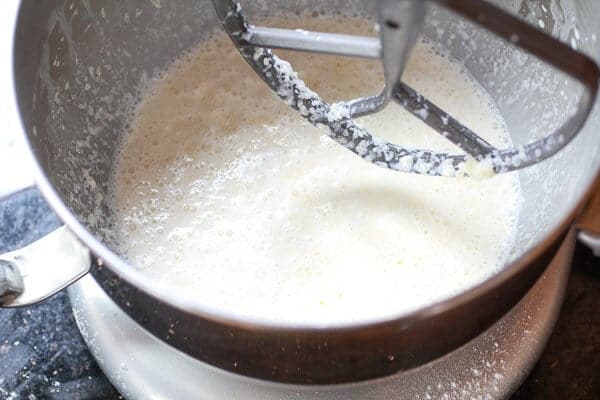
In the large bowl of a stand mixer (or in a large bowl) fitted with the paddle attachment, combine the remaining sugar, salt, melted butter, milk and the yeast mixture and mix on medium speed until combined.
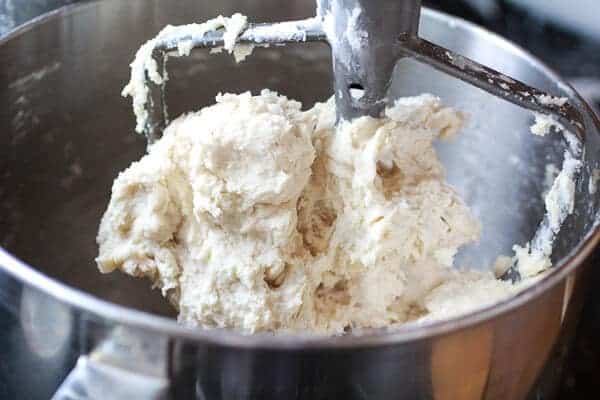
Gradually add the flour 1/2 cup at a time and mix just until the dough comes together in a sticky ball. I ended up using all five cups, but you may need less.
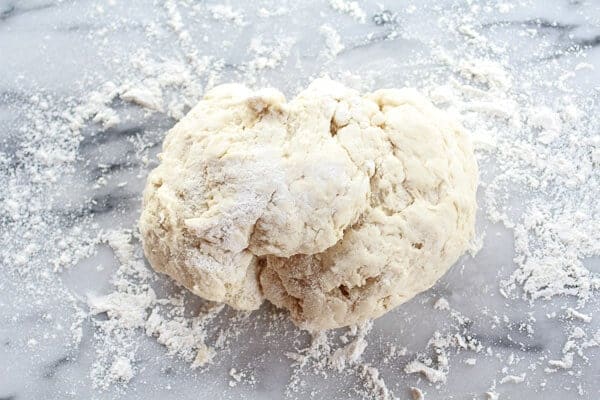
On a lightly floured surface, roll out the dough into a rectangle about 1/2 inch thick. Transfer to a large baking sheet and cover with plastic wrap. Place in the fridge until chilled, about 40 minutes.
It’s butter time…..
Also, the secret to amazing croissants and also a pain my rear.
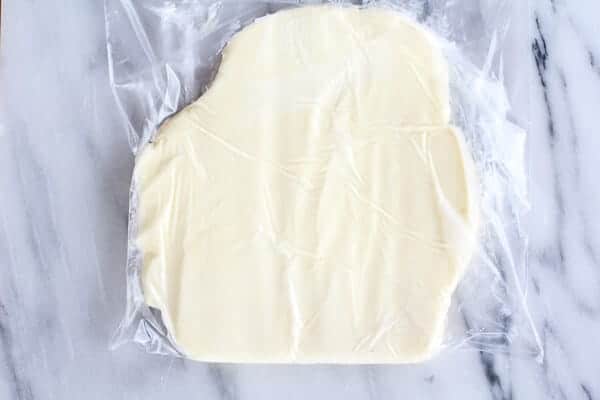
I found it was easiest to place all four sticks of butter together in a gallon size ziplock bag. Then using a rolling-pin, beat the butter on a work surface to flatten it. Continue to gently beat the butter with the rolling-pin and shape the butter into a 6-by-8-inch rectangle. This part was really kind of hard, but just keep working it.
Place the butter back in the fridge and grab the dough (after 40 minutes or so of chilling in the fridge). Now it is time to laminate the dough, which just means fold the dough with the butter to create layers. On a lightly floured work surface, roll out the dough into a 16-by-10-inch rectangle.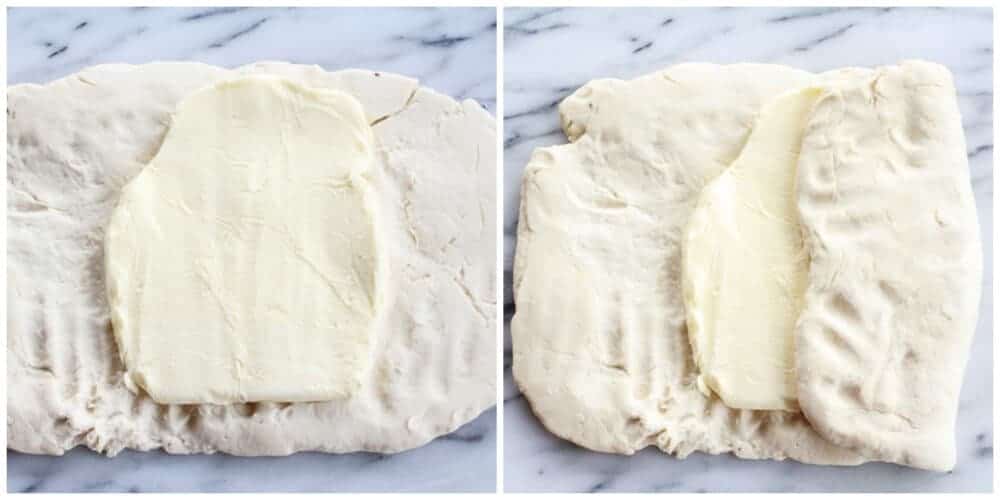
With a short side facing you, place the butter in the middle of the dough. Fold the ends up like a letter. Fold over the upper half to cover the butter and press the edges together to seal. Then fold over the remaining lower half and press the edges together to seal.
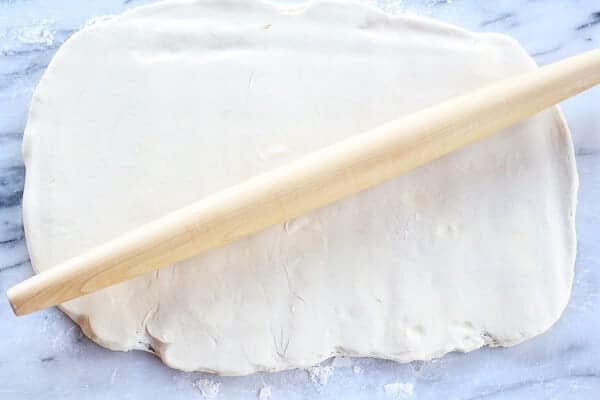
Turn dough again so the short side is facing you, and use the rolling-pin to press down equally on the dough to help flatten it. Roll dough into a 15 x 10 inch rectangle.
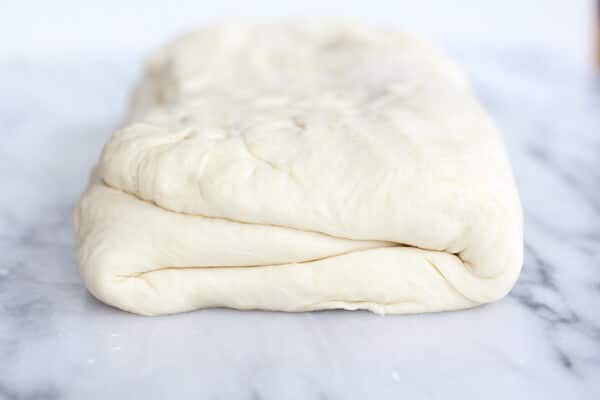
Then fold the dough like a letter again, with a short side facing you, fold the bottom third up, then fold the top third down. Use your hands to pull the dough into a rectangle shape. You should now have a roughly 11 x 6 inch rectangle. This completes the first turn. Wrap in plastic wrap and place in the fridge to chill for 45 minutes.
Return the chilled dough to the lightly floured work surface with a folded side to your left and repeat the process to make 3 more turns, rolling, folding and chilling the dough each time, for a total of 4 turns. After the final turn, refrigerate the dough for at least 4 hours or overnight (I chilled mine overnight).
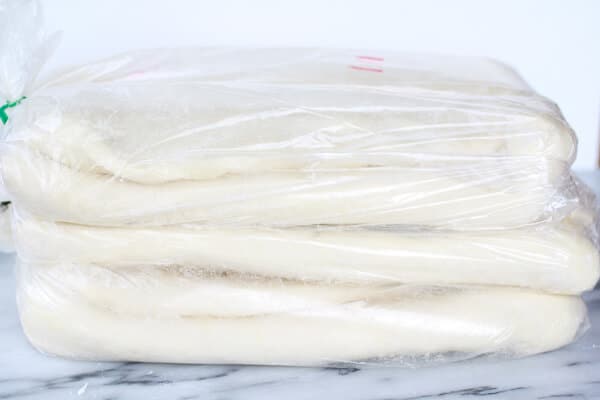
That photo above would be all three of my batches…..
What was I thinking?
In over my head.
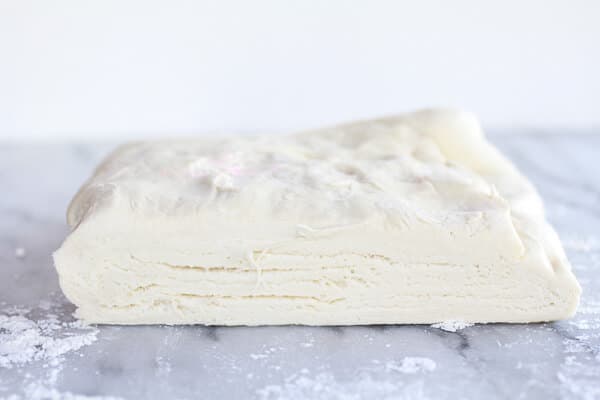
Now it’s time to form the croissants. Divide the dough in half and place one half in the fridge while working with the other half. Hopefully your dough will look like the photo above, with layers of dough and butter. If not? Pray for the best! Roll out one half of the pastry on a lightly floured work surface into a 9-by-18-inch rectangle. Using a pizza cutter or sharp knife cut the dough in half lengthwise, and then cut the dough into triangles.
Roll out one half of the pastry on a lightly floured work surface into a 9-by-18-inch rectangle. Using a pizza cutter or sharp knife cut the dough in half lengthwise, and then cut the dough into triangles. 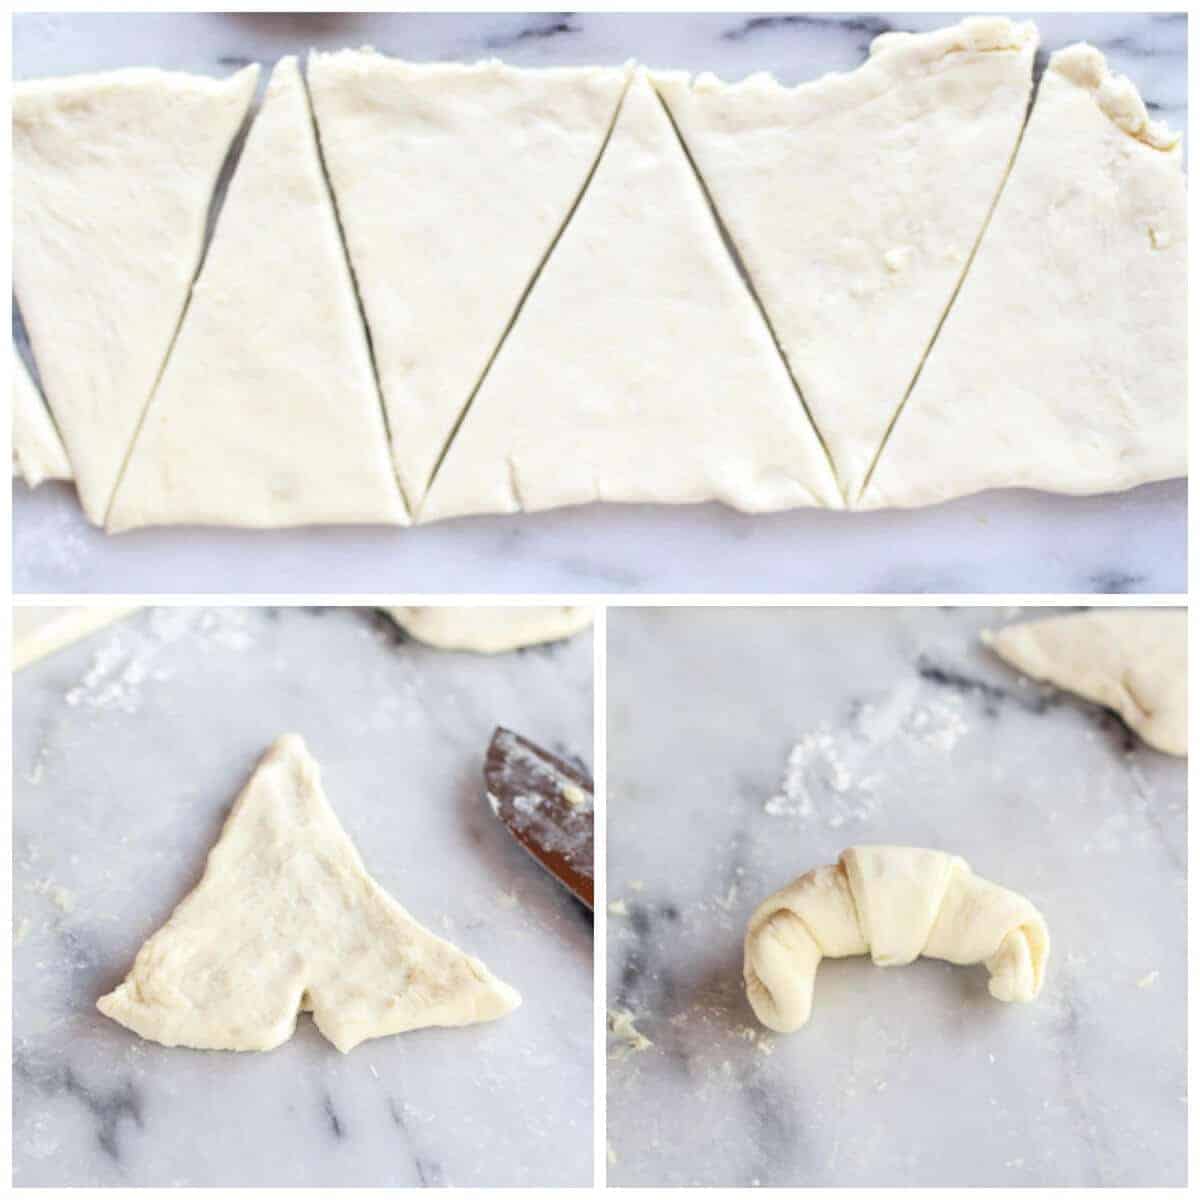
Cut a small vertical slit right into the middle of the straight end, and using both hands, roll croissant up pushing the sides out to either side. Place on a baking sheet about 2-3 inches apart, cover with a towel and set in a warm place to rise for 1-2 hours. The croissants will not double in size like other yeast doughs do. After one hour position a rack in the middle of the oven and preheat to 425 degrees
Lightly brush the tops of the pastries with the egg mixture. Bake the pastries, 1 sheet at a time, until golden brown, 15-18 minutes. Transfer to a wire rack and let cool on the pan. DEVOUR
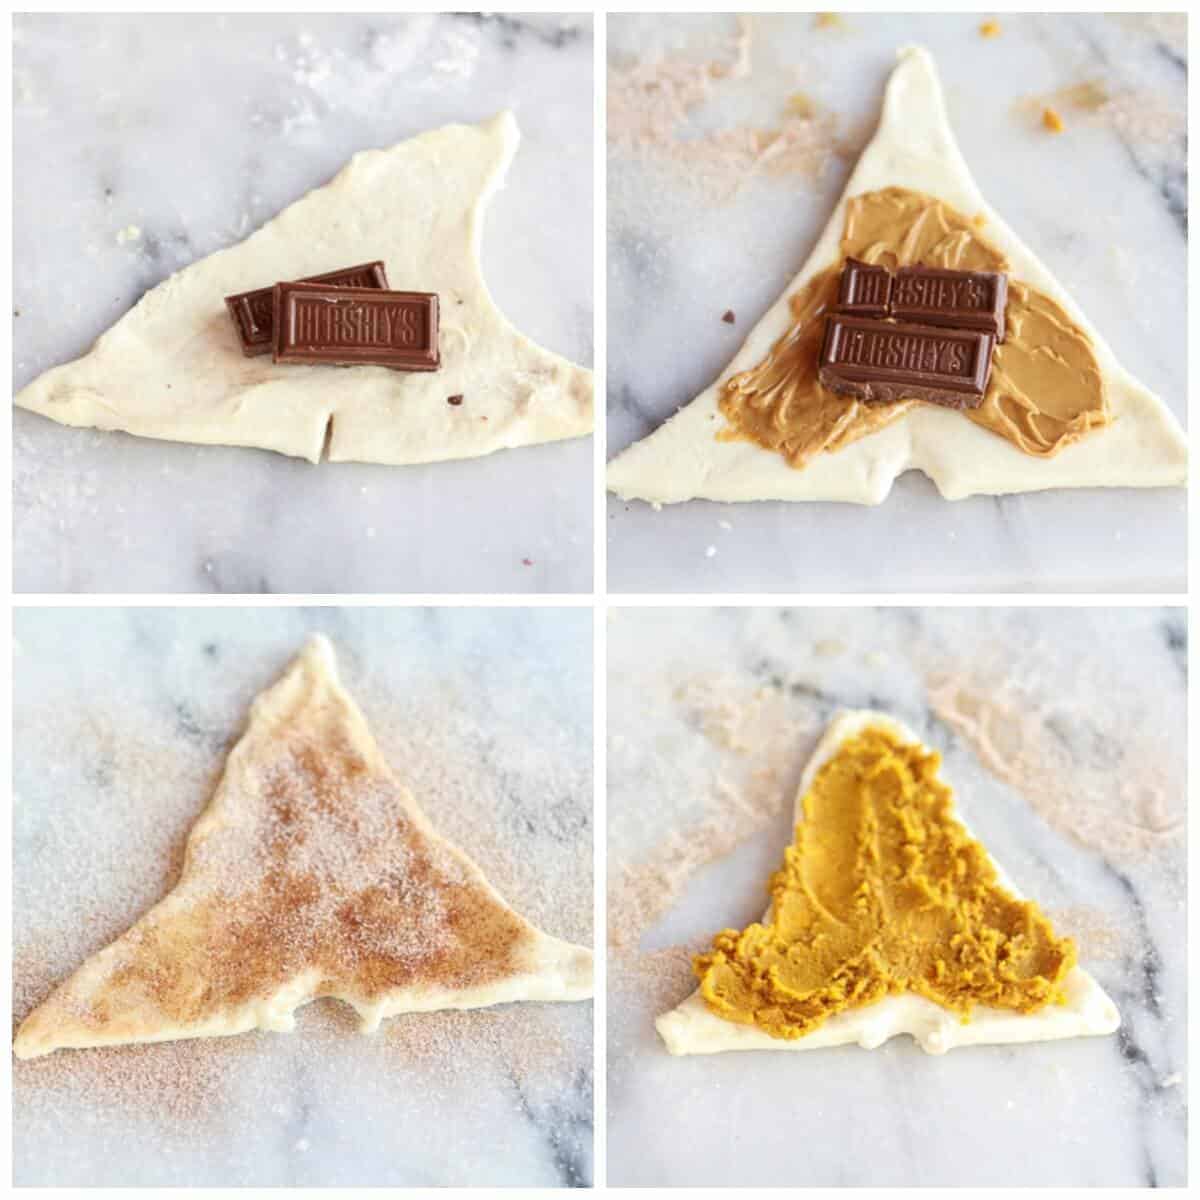
Or, you can also stuff the croissants with fun fillings. I did chocolate, chocolate peanut butter, cinnamon sugar and cinnamon sugar pumpkin.
All so incredibly good.

And so incredibly flakey.
It’s all those layers of butter.

Perfect with a smear of thick homemade pumpkin butter (I have never had the Trader Joe’s stuff, but I think homemade is always better) or apple butter or jam or just more butter!
Or even all by themselves fresh from the oven. So good.

Or with…

Some chocolate.
Obviously, that one had to happen. As I said, I also did chocolate peanut butter and cinnamon sugar, but stupidly I only made two of each of those and they were gone the second they came out of the oven.
Killer.
The fourth one was cinnamon sugar pumpkin, the photo below. I think this one was my favorite. Perfect for fall, yes, but I just love these flavors. It was epic.
Make-Ahead, Storage & Reheat
-
Make-ahead: Pause after shaping. Freeze on a sheet until firm, then bag. Thaw in the fridge, then proof until puffy before baking.
-
Leftovers: Keep covered at room temp; re-crisp briefly in a warm oven until the exterior is flaky again.
-
Freezing baked: Wrap well; reheat from thawed until the crust crackles.

Homemade Croissants (with step-by-step photos)

Ingredients
- 4 1/2 teaspoons yeast
- 1/4 cup sugar
- 6 tablespoons warm water
- 2 teaspoon salt
- 4 tablespoon butter, melted
- 2 cups cold milk
- 5 cups flour, plus more for working
- 2 cups cold unsalted butter, 4 sticks
- 1 large egg, beaten
Optional Fillings
- 3/4 - 1 1/2 cups pure pumpkin, 36 - 72 teaspoons
- 36 squares chopped chocolate
- 3/4 - 1 1/2 cups peanut butter, 36 - 72 teaspoons
- 36 teaspoons cinnamon sugar
- 3/4 - 1 1/2 cups Nutella, 36 - 72 teaspoons
Instructions
- In a small bowl or bowl of a stand mixer, dissolve the yeast and a pinch of the sugar in the warm water. Let stand until foamy, about 5 to 10 minutes.
- To mix the dough by hand, In a large bowl, combine the remaining sugar, the salt, melted butter, milk, the yeast mixture and 1/2 cup of the flour, and mix with a wooden spoon until blended. Gradually add the remaining flour 1/2 cup at a time and mix just until the dough comes together in a sticky ball.
- To mix the dough by stand mixer, In the large bowl of a stand mixer fitted with the paddle attachment, combine the remaining sugar, the salt, melted butter, milk and the yeast mixture and mix on medium speed until combined. Gradually add the flour 1/2 cup at a time and mix just until the dough comes together in a stick ball.
- On a lightly floured surface, roll out the dough into a rectangle about 1/2 inch thick. Transfer to a large baking sheet and cover with plastic wrap. Place in the fridge until chilled, about 40 minutes.
- While the dough is chilling make the butter package. I found it was easiest to place all four sticks of butter together in a gallon size ziplock bag. Then using a rolling pin, beat the butter on a work surface to flatten it. Continue to gently beat the butter with the rolling pin to shape the butter into a 6-by-8-inch rectangle. This part was really kind of hard, but just keep working it. Once the butter is in the shape of a rectangle place it back in the fridge to stiffen up again. Don't worry if your butter is not in a perfect rectangle. It's still going to work.
- Now it is time to laminate the dough, which just means fold the dough with the butter to create layers. On a lightly floured work surface, roll out the dough into a 16-by-10-inch rectangle. With a short side facing you, place the butter in the middle of the dough. Fold the ends up like a letter. Fold over the upper half to cover the butter and press the edges together to seal. Then fold over the remaining lower half and press the edges together to seal. Turn dough again so the short side is facing you, and use the rolling pin to press down equally on the dough to help flatten it. Roll dough into a 15 x 10 inch rectangle. Then fold the dough like a letter again, with a short side facing you, fold the bottom third up, then fold the top third down. Use your hands to pull the dough into a rectangle shape. You should now have a roughly 11 x 6 inch rectangle. This completes the first turn. Wrap in plastic wrap and place in the fridge to chill for 45 minutes.
- Return the chilled dough to the lightly floured work surface with a folded side to your left and repeat the process to make 3 more turns, rolling, folding and chilling the dough each time, for a total of 4 turns. After the final turn, refrigerate the dough for at least 4 hours or overnight (I chilled mine overnight).
- To form the croissants, cut the dough in half and place one half in the fridge while working with the other half. Roll out one half of the pastry on a lightly floured work surface into a 9-by-18-inch rectangle. Using a pizza cutter or sharp knife cut the dough in half lengthwise, and then cut the dough into triangles. Cut a small vertical slit right into the middle of the straight end, and using both hands, roll croissant up pushing the sides out to either side. Place on a baking sheet about 2-3 inches apart, cover with a towel and set in a warm place to rise for 1-2 hours. The croissants will not double in size like other yeast doughs do. After one hour position a rack in the middle of the oven and preheat to 425 degrees F.
- Lightly brush the tops of the pastries with the egg mixture. Bake the pastries, 1 sheet at a time, until golden brown, 15-18 minutes. Transfer to a wire rack and let cool on the pan. Serve warm or at room temperature. Store in an airtight container at room temperature for up to 1 day. Makes 25-32 croissants.
- To freeze the croissants before baking, complete the steps through step 8. Once all the croissants have been rolled place them on a baking sheet lined with wax or parchment paper. Cover the baking sheets and freeze for about 2 hours. Remove the pans and place the croissants in a freezer safe bag and seal. Immediately place back in the freezer and freeze for up to 6 months. To bake, allow the croissants to thaw overnight in the fridge and then bake as directed.
- Optional fillings for the croissants: 1-2 teaspoons of pure pumpkin 1 -2 teaspoons peanut butter + 1 square of chocolate 1 teaspoon cinnamon sugar 1-2 teaspoons NutellaRoll each triangle up as directed. Brush each top with egg wash and for the pumpkin and cinnamon sugar croissants, sprinkle with more cinnamon sugar. Bake as directed.
Notes
Nutrition
Nutritional information is only an estimate. The accuracy of the nutritional information for any recipe on this site is not guaranteed.
Did you make this recipe? Please rate & comment below.

So worth it.






















How do you have enough time to make these AND that incredible buckeye cake? You blow my mind Tieghan. This is no exception. That pumpkin one; on my word, I might have to go to all the work just to have that. So impressed!
Oh my gosh, I don’t! I am insane. LOL!
Thanks so much, Mary!! I hope you make the pumpkin one. It’s so good!
Yay! Go you on making those from scratch…I’m not brave enough. Those chocolate filled ones look amazing!
Thank you, Leah!
Croissants truly are a labor of love and it looks like you nailed them. Flaky, buttery…everything a great croissant should be.
Thank you, Dara!
I’ve always wanted to try to make my own croissants. Yours look incredible and I love that you stuffed them with different fillings. Look great!
Happy Blogging!
Happy Valley Chow
Thank you! Hope you do give them a try!
I’ve once made croissants and it took me the whole weekend. It was worth it, but now I’m just like “next vacation” I’ll make the next batch… The next vacation here in Germany is in November, maybe I can test your recipe then 😀
Thanks Jana!! Hope you love this recipe!
Epic indeed, Tieghan! Great step-by-step photos and instructions as well! You are a smart cookie…to make a triple batch so you’re covered for Thanksgiving AND Christmas! Everyone will love you over the holidays. 😉 Such a brilliant idea. I’m venturing into gluten free croissant territory soon (read: lots of testing). So, wish me luck! Thanks for sharing, girl! xo
Oh my gosh, GOOD LUCK! That sounds like a lot of work!
Thanks Stacy!
I’m dying over those flaky layers! I can’t believe your freezer is stocked with 50 of these… I call that dangerous! 😉
HA! I know, but I have to save them. I have to! Wish me luck!
Thanks Laura!
Wow. I am so making these! They look absolutely GORGEOUS!! and I’m loving all those fun fillings! Great step-by-step photos!
Thanks Sarah!
Wow. These are INCREDIBLE.
But I think I can understand now, why most people buy the Pillsbury kind. Gosh, what a long process! I have great respect for bakers who can go through all the trials and tribulations of croissant making.
Ohhh my gosh, that pumpkin cinnamon sugar one looks out of this world. <3 I need one. Now.
pinned! 🙂
Thanks Abbie!! The pumpkin cinnamon sugar was my favorite!
My husband and I just got back last night from a few weeks in Europe including a stop in Paris where we ate far too many croissants. I told my husband that when we get home I want to try and make some — perfect timing – thanks!!!
Oh man, I am not sure mine are as great as the ones straight from Pairs, but they will do they trick since we can’t hope on over to paris anytime we want for a Croissant! What an awesome trip!
Thanks Allyson!
Sigh.
Oh Tieghan, you make it look so beautifully easy! I have been wanting to try my hand at croissants for years but it just never happens. I have been telling myself lately that when we live in a different house with a kitchen more conducive to croissant-making – THAT’S when I’ll make it happen!
Ha!! You have to give them try at least once. There is nothing like a hot homemade croissant right out of the oven. It’s awesome!
Hi, would you please give ingredients and weights etc for this recipe so I can make the croissants? Thank you
I have never cared for croissants because of the greasiness from so much butter. However, apples, brown sugar, and cinnamon would make these delicious I bet.
Yeah, that would be an awesome combo!!
They look fantastic!! There’s nothing better than a homemade croissant warm from the oven. I’m dying to give them another go soon, but it’s so hot here now that it just doesn’t seem doable :((( I’ll try your version next time I make them, because the pb + chocolate one are calling my name 😉
Thanks Consuelo!!
Wow they look AMAZING! I have to say I’ve never had a burning desire to make croissants only b/c I’ve heard it’s so hard but you just made it seem do-able. Since you have 50 in your freezer, I could just raid your stash 🙂 Pinned!
Haha! Yeah, I know what you mean! You are welcome anytime!
Thanks so much, Averie!