

This post may contain affiliate links, please see our privacy policy for details.

These Salted Honey Butter Jalapeño Cheddar Rolls are soft, buttery perfectly salted, and made with spicy jalapenos and sharp cheddar cheese. Each light and airy roll is wonderful right out of the oven with a smear of sweet honey butter. Everyone loves these yummy dinner rolls. They have the best texture and really do melt in your mouth.

Half Baked Harvest At Home
20+ new recipes for wholesome comfort food made with everyday ingredients. Pre-order today! HBH At Home will be released on Tuesday, February 23rd!
Is there anything better than a really delicious dinner roll with flaky crust? My mom used to make homemade bread all the time on Sunday or Monday nights beginning in the fall. I used to love the smell of the fresh bread baking away in the oven. It always gave such a cozy vibe.
My mom had this old-school bread machine that would make and bake the dough for her. Does anyone else have anything like that? I don’t think she still has that bread machine. It probably never made the cut in our move out to Colorado. But once the crisp fall nights arrive, I always think back to those days.

Because of her, I too almost always bake up bread once a week during the fall. More times than not it’s a simple loaf of bread. Sometimes I’ll make a loaf of herby garlic bread, other nights I’ll make rolls.
Just depends on the night!
But these rolls! They’re a fun appetizer for game day, and equally great as a dinner roll on busy weeknights. No matter how you serve them, they’re always delicious.

Here are the details, these are easy
For the dough, simply mix flour with instant yeast and a pinch of salt. I used instant yeast to keep the rolls really quick and easy for us all.
Next, add warm milk, a touch of honey, and salted butter. Then lots of sharp cheddar cheese and jalapeno peppers. Mix until smooth, and let the dough rest for ten to 15 minutes or even a few hours. The dough will not get super puffy, but that’s OK since we’re using instant yeast. We get to skip an entire hour-long rise, which is helpful on busy nights!
Shaping the rolls is fun, it’s kind of like a cinnamon roll!
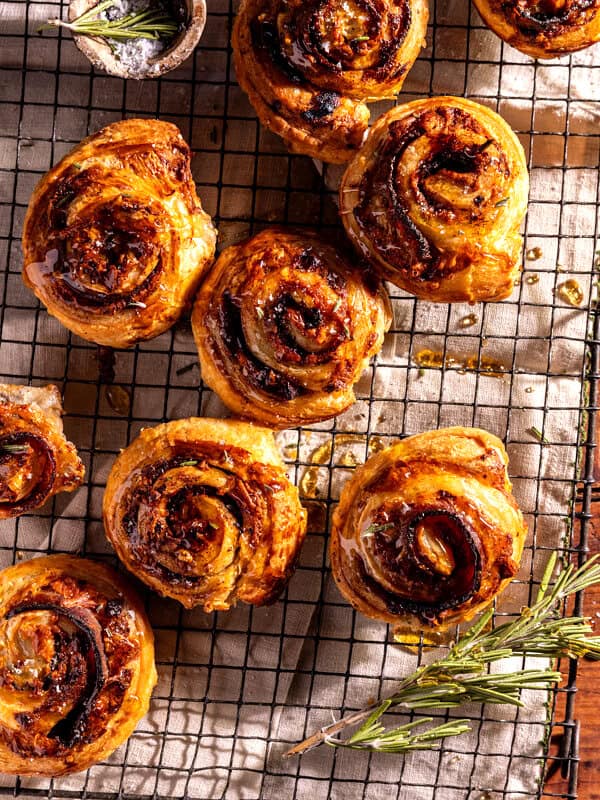
Roll out the dough, spread on the honey butter, then cut the dough into strips and roll them up like cinnamon rolls. This ends up actually being a pretty and fun process.
Let the rolls rise for a bit before baking. Once they become puffy on top, brush them with an egg, and then bake.
I love to serve these up warm, with a smear of honey butter, then sea salt on top. A sprinkle of sea salt makes every bite of these soft, spicy, cheesy rolls just that much better.
Great as a game-day appetizer OR as a dinner roll. You really can’t go wrong!
Looking for other savory bread recipes? Try these.
Salted Honey Butter Parker House Rolls
Jalapeño Cheddar Popovers with Honey Butter
Soft Garlic Herb Cheddar Cheese Bread
Lastly, if you make these Salted Honey Butter Jalapeño Cheddar Rolls be sure to leave a comment and/or give this recipe a rating! Above all, I love to hear from you guys and always do my best to respond to each and every comment. And of course, if you do make this recipe, don’t forget to tag me on Instagram! Looking through the photos of recipes you all have made is my favorite!
Honey Butter Jalapeño Cheddar Rolls

Ingredients
- 3 1/2 – 4 cups all-purpose flour
- 2 1/4 teaspoons (1 packet) Rapid Rise yeast
- 1/2 teaspoon kosher salt
- 2 cups grated cheddar cheese
- 1-2 jalapeños, seeded, if desired, chopped
- 1 cup warm whole milk
- 3 tablespoons honey
- 4 tablespoons salted butter, at room temperature
- 1 large egg
Honey Butter
- 6 tablespoons salted butter, at room temperature
- 3 tablespoons honey
- flaky sea salt
Instructions
- 1. In the bowl of a stand mixer, combine the flour, yeast, and salt. Add the cheese and jalapeños. Mix with a fork to combine. 2. Pour in the warm milk, honey, egg, and butter. Using the dough hook, mix until the flour is incorporated, about 4-5 minutes. If the dough seems sticky, add the remaining 1/4 -1/2 cup of flour. Cover the bowl and let sit at room temperature for 15 minutes or up to a few hours at room temperature.3. To make the honey butter. Combine the butter, honey, and a pinch of salt together in a small bowl.4. Preheat the oven to 350° F. Grease a 9×9 inch square baking dish.5. Lightly dust your work surface with flour. Turn out the dough, punch it down, and divide the dough in half. Roll each half to a 12-inch square, about 1/4-inch thick. Brush each square with honey butter, saving any leftover butter for serving. Cut each square of dough into 6 strips. Roll each strip into a coil (see above photo) and arrange, seam side down, in the prepared baking dish.6. Cover the dish and let the rolls rise for about 30 minutes, until they're puffy. Alternatively, you can let the rolls sit in the fridge overnight.7. Bake the rolls for 20-25 minutes, until they're golden brown. Remove them from the oven and brush with the remaining honey butter. Pull them apart to serve warm with a sprinkle of flaky sea salt.
Notes
Nutrition
Nutritional information is only an estimate. The accuracy of the nutritional information for any recipe on this site is not guaranteed.
Did you make this recipe? Please rate & comment below.



















How do you store these once baked? In a container on the counter or in the fridge?
Hey Abigail,
An airtight container on the counter is great:) I hope you love the recipe! xT
These will be on repeat this fall/winter!!! I want to eat the whole dish! They took 40 mins to cook and I put foil over them for the last 10 mins. Don’t skimp on the honey butter- it’s sooo good!
Hey Laura,
Wonderful! I love to hear that this recipe was enjoyed and appreciate you giving it a try! Have a great weekend!🍁
Yes mine needed a bit longer too
Hi! Are we supposed to brush them with an egg or not? Thanks!
Hi Rian,
Nope, no need to brush with egg:) I hope you love the recipe, please let me know if you give it a try! xx
I had a similar experience to many of the comments here. The flavor was amazing, but they were definitely a bit doughy in the middle. I read the reviews before baking so I knew to bake them longer, but the top was getting pretty brown. I ended up taking them out and separating them onto a baking sheet and baking a bit longer with a little foil laying on top so they didn’t burn. I think the issue might be they are too I thick? I think next time I would cut the strips in half and make them smaller? Maybe the middle would bake better if it was less dense? Delicious with the honey butter. I served with a big bowl of chili yum!
Hi Christine,
Perfect! I appreciate you making this recipe and sharing your feedback, I am so glad it was a hit! Sorry to hear you had issues with the middle baking, I would just cover with foil next time and increase the bake time. xx
I was so excited for these rolls but after 25 minutes they came out underbaked and a gooey, raw mess. They take much longer than the 20-25 minutes to bake. Sometimes your baking recipes don’t work for me and I wonder if it’s because I am located at sealevel and I know you live in Colorado, are you at a higher altitude? How many times are these recipes tested before you share?
Hi Meghan,
Thanks for making this recipe and sharing your feedback:) Recipes are tested anywhere between 3-10 times before sharing. All ovens differ so if you need more baking time simply add that on! Please let me know if you have any other questions! xx
We had the same result. Gooey raw center but baked golden on the outside. Such a bummer.
Delicious recipe! I had to bake for about an hour to get the dough fully baked through. At 20–25 minutes it was still raw. The instructions leave out brushing the egg on top of the rolls before baking, but it is mentioned within the blog post.
Will definitely make this again, but next time I’ll try baking them on a cookie sheet to see if they bake more evenly.
Hey Christina,
Happy Monday!! I truly appreciate you trying this recipe and sharing your feedback, so glad it was enjoyed! xx
Hey!! I love making these rolls but was wondering – Would you recommend using bread flour in lieu of all purpose? Or stick with all purpose? Thanks!
So glad you have been enjoying this recipe Alicia! I really never work with bread flour, but I’m sure it would work well for you here! xx
Mine turned out pretty good but they needed 55 min to cook. Easy to make! I didn’t use the full amount of salted honey butter in the recipe and that was a mistake. I should have spread it on thicker for more flavor. I think the original (no cheddar or jalapeño- just salted honey butter) is hard to beat!!
Hi there,
Happy Monday!! I truly appreciate you trying this recipe and sharing your feedback, so glad it was enjoyed! xx
With this cooking time you will pop out a big heap of raw better dough. You need to double it.
Hi Eryn,
Thanks for giving the recipe a try, sorry to hear it didn’t workout for you. Please let me know if I can help in anyway! xx
I added pepperoni to mine to make a pizza spin! Also served with tomato soup
Awesome!! So glad you enjoyed this recipe, Amanda!!
These were delicious! Our whole family loved them. We did have to bake for a lot longer than the time given, about 50 minutes and even then the center rolls were still pretty doughy. I would try them again on a baking sheet to see if that would help them all cook evenly
Hi Samantha,
Happy Friday!! I am thrilled to hear that this recipe was a hit, thanks a bunch for giving it a go!? xT
These look amazing!! I’m wondering if you’ve tried keeping this dough overnight in the fridge? Both King Arthur Flour and Serious Eats warn against using rapid rise yeast in overnight ferments as they are meant primarily for doughs with a shorter rise time. It might be good to suggest that if one were to choose an overnight stay in the fridge for the dough, they shift to instant yeast rather than rapid rise as it is more stable for a longer rise time. Can’t wait to try these!
Hey Patrice,
Sure, you could totally keep the dough in the fridge overnight! I hope you love this recipe, please let me know if you give it a try! xx
I believe that the metric amount of flour at 937g of flour is wrong, at 120g per cup, 4 cups should only be 480g.
This makes so much more sense, I tried this recipe today and it nearly burnt out my stand mixer as it was so dry and hard to work with. I binned it. I’ll try again with the new measurements. Thank you.
Hi Nadiya,
Thanks for pointing this out, we use a metric conversion from Google, so I don’t really have control over this, so sorry! xxTieghan
No worries, made it with the adjusted amount and they were so yum!
Awesome!!
Added these to my ladies u co might dinner. So delicious and everyone impressed. You have inspired me to make dough and I’m finding it not difficult but fun. And all delicious. I’m making pizza dough too.
Hi Pam,
Amazing!! I love to hear that this recipe was enjoyed, thanks so much for making it! Have a great weekend! xTieghan
Does the egg go in the dough, or just brushed on top? Post and recipe have two different instructions.
Hi Donna,
The egg is added to the dough in step 2. Please let me know if you have any other questions, I hope you love this recipe! xT
I made these two nights ago. I baked them about 15 mins longer which is how it goes with almost every baking recipe I make! May be my oven! Doesn’t bother me a bit to bake things a little longer. These really, REALLY hit the spot. SOOOOO comforting and delicious. I am so looking forward to making these the next time I make chili or stew or something, though they were wonderful by themselves! Thanks for another winner T!
Hi Bri,
Amazing!! Thanks a lot for trying this recipe and sharing your feedback, I love to hear that it was tasty for you! xT