Next Post
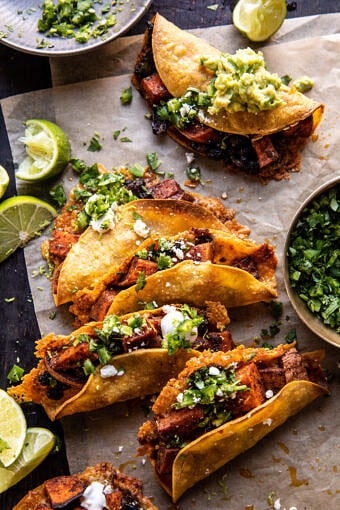
Crispy Chipotle Sweet Potato Tacos with Lime Crema.
Originally published Nov 30, 2021 • Updated Aug 15, 2025
This post may contain affiliate links, please see our privacy policy for details.
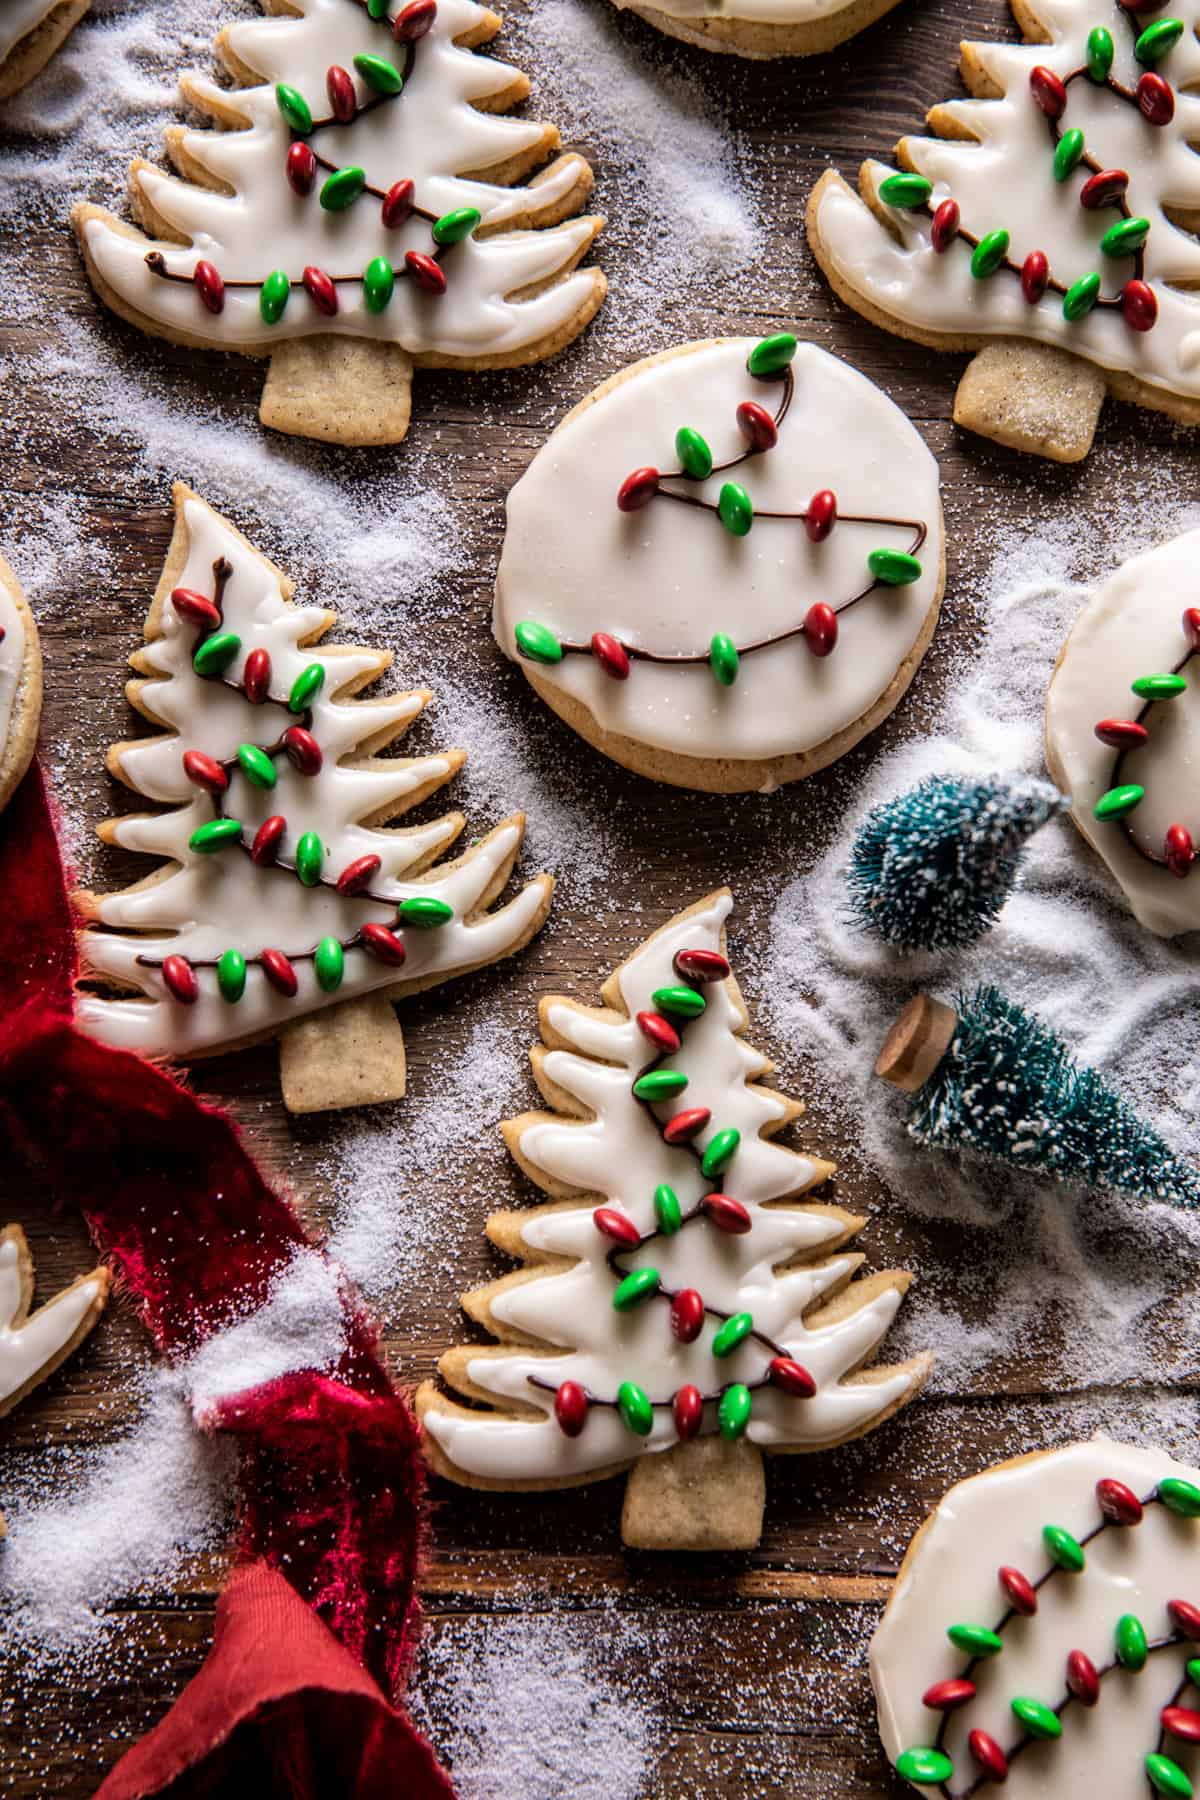
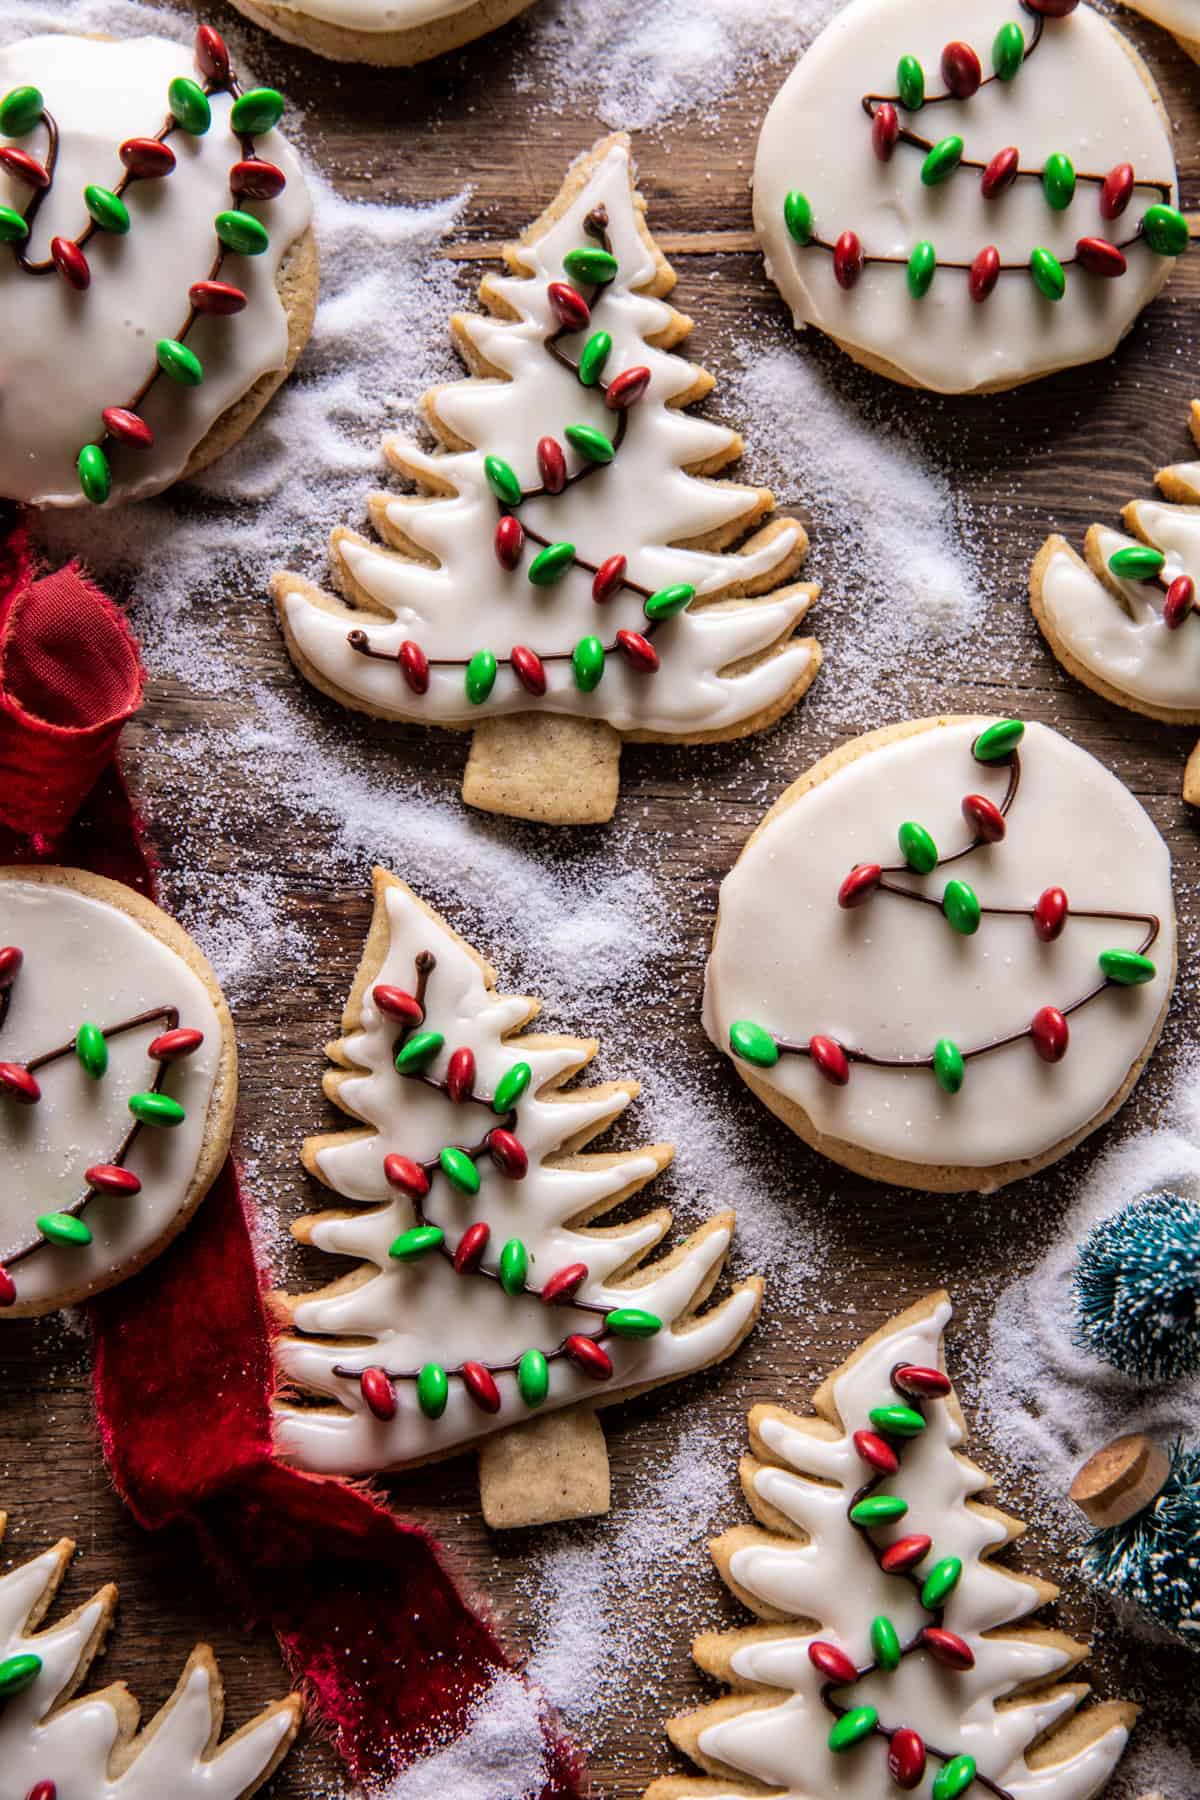
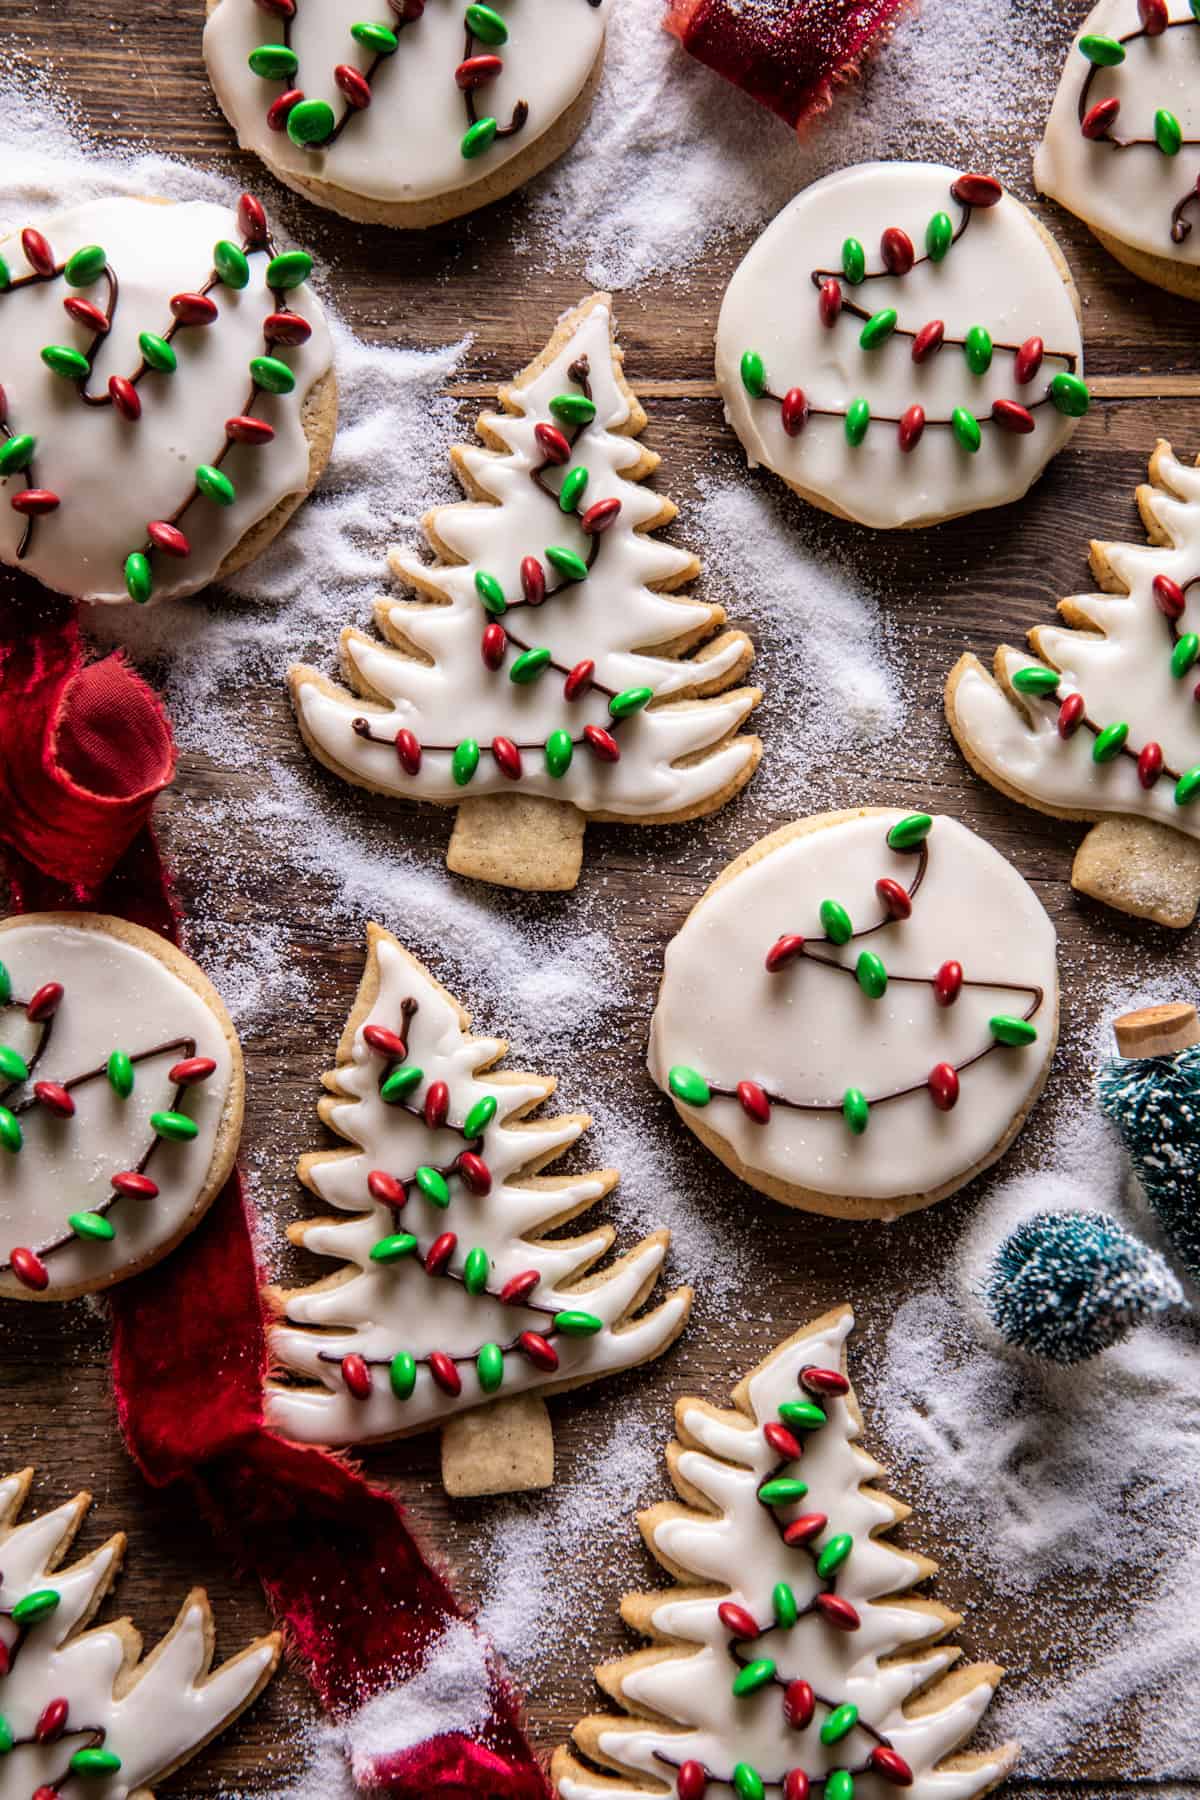
Officially kicking off the holiday season with these easy Easy Vanilla Bean Christmas Lights Cookies. Made with nutty brown butter, double the vanilla, and a little bit of chocolate. These cookies are soft, buttery, and perfectly sweet with the best vanilla flavor. They’re generously glazed with a sweet, thick, and creamy vanilla bean glaze. And decorated with sweet chocolate and delicious holiday M&M’s for truly some of the best sugar cookies around. The secret is all in the combination of brown butter and real vanilla beans, which keep these cookies incredibly flavorful. Fun to bake, delicious to eat. These make for a great homemade gift, and a festive addition to your holiday cookie box!
This is the year I’m focusing on ALL of the Christmas cookies. I have so many ideas and not enough days to share…picking the best cookies has been hard!
These were an easy choice though. They actually started out a little differently, but as soon as I had the idea to do Christmas lights, I was excited.
My goal this year is fun holiday desserts – but easy. Nothing too time-consuming and no big scary decorating projects. Just delicious, easy, cute, and extra festive. These cookies are all of those things.
My hang-up with basic sugar cookies is that they’re often flavorless and the frosting is even worse. They just taste like sugar, and I’m definitely not into that.
With these cookies, I wanted to add flavor with brown butter and real vanilla bean. The chocolate on top, just makes them even better.
Brown the butter, then let it cool off in the freezer a bit. Once it’s cooled (you only need 15 minutes), you can start mixing and baking.
Beat the butter with the sugar and vanilla bean powder. You’ll want to beat for at least a minute to really infuse the butter with the vanilla flavor. Next, add an egg and all the dry ingredients, then roll, cut, and bake. There’s absolutely nothing fancy here.
Whenever I make any kind of cut-out cookie, I always like to roll out the dough, cut the cookies, and then freeze the cut cookies on a baking sheet for a few minutes. This ensures that the cookies hold their shape. To cut my cookies, I used a simple circle cookie cutter and a holiday tree.
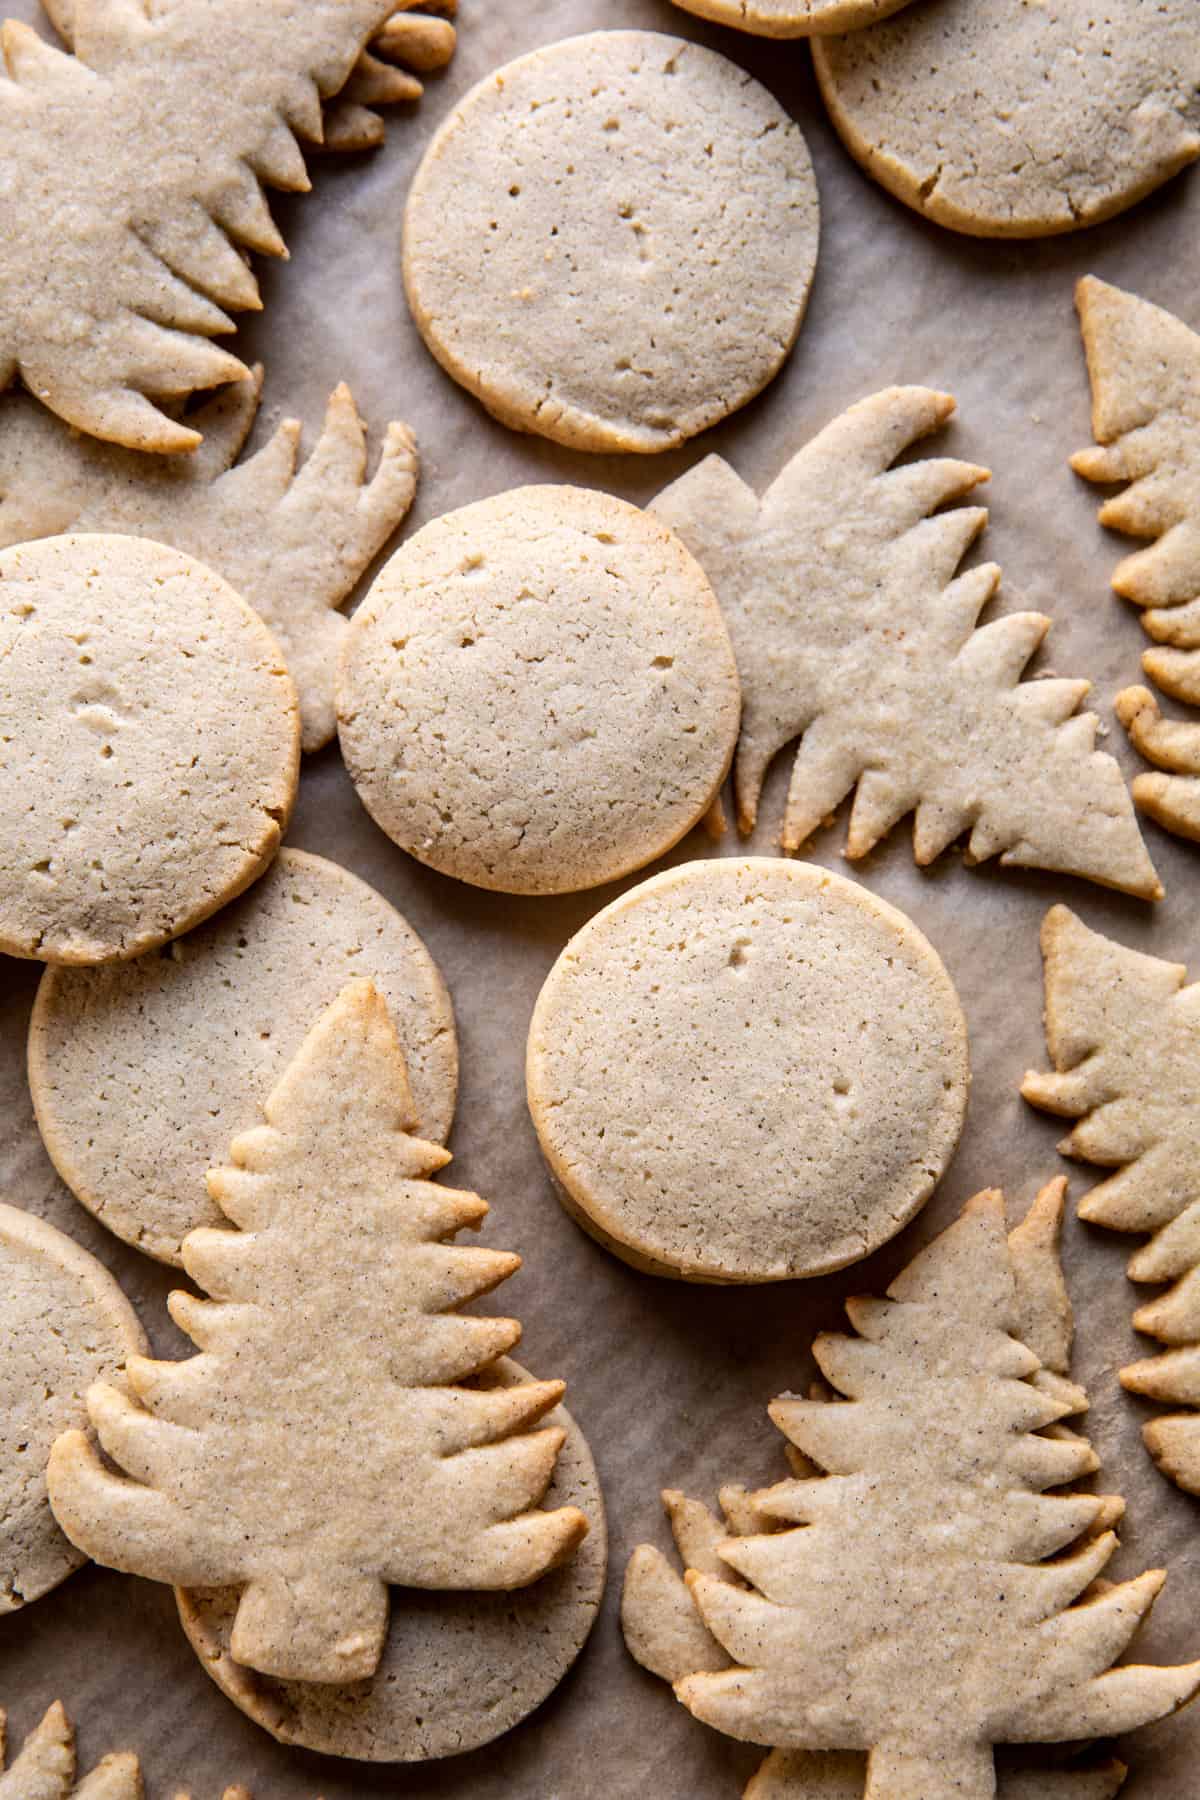
I LOVE slice-n-bake cookies, and you can easily slice-n-bake with this dough!
Just divide the dough in half as directed, then roll each piece of dough into a log and chill in the fridge until totally solid.
If you have an almost empty roll of wrapping paper around, cut the roll and fit it around each log, this will prevent the dough from forming a straight edge in the fridge!
And when ready to bake, simply slice-n-bake!
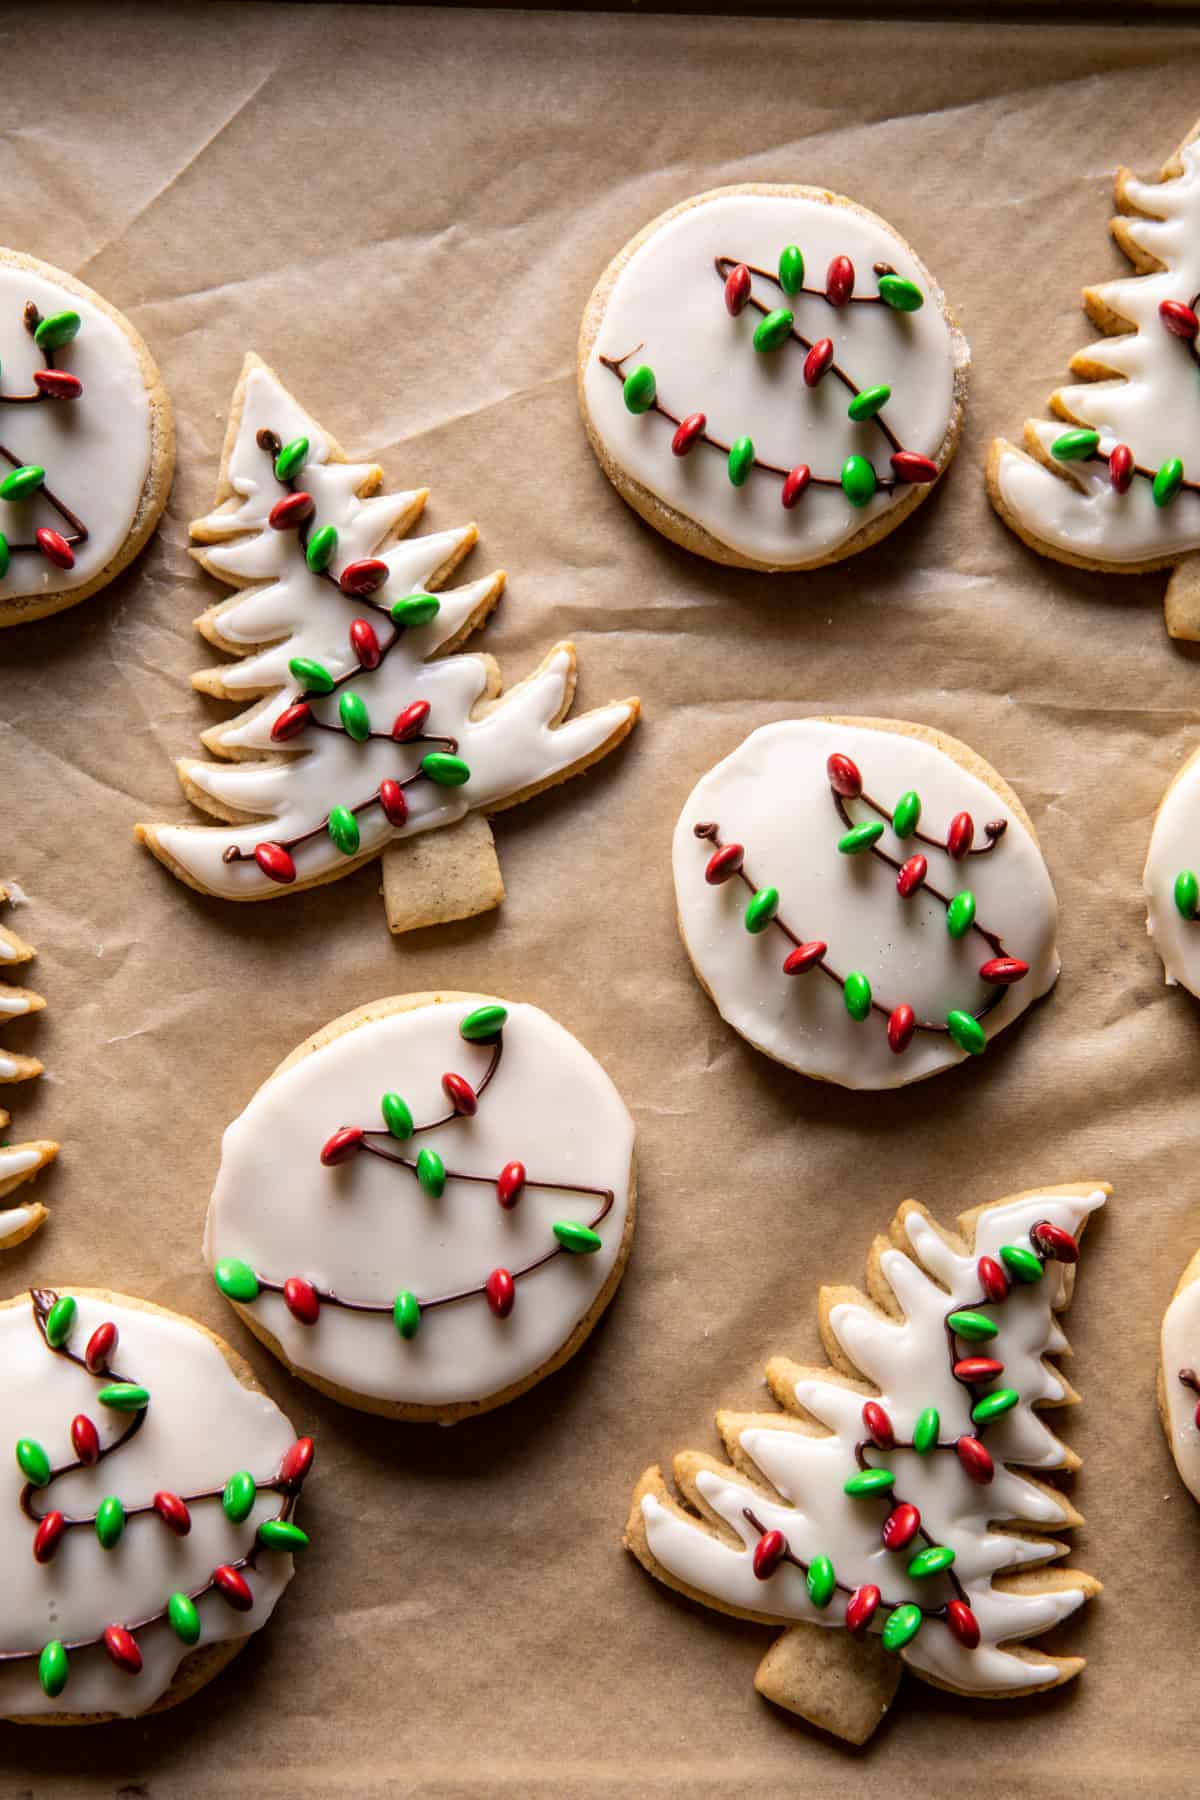
I kept the icing simple, since I wanted the color to remain white but still have a nice flavor for these vanilla bean sugar cookies. I added a small amount of maple syrup and lots of vanilla.
It’s simple, but with the chocolate on top, perfect!
When it comes to cookies, I try to keep the decorating as easy as can be, and this is EASY. I used melted chocolate to draw on the cords for the lights, then used mini holiday M&M’s for the lights.
Doesn’t get easier, but looks so cute once finished!
Asher wasn’t around when I made these, so I can’t wait to make these again soon with her. She’s going to love them! They’re the perfect Christmas cookie to make with kids and for your next Christmas cookie exchange.
Looking for other Christmas cookies? Here are my favorites:
Vanilla Ginger Shortbread Wreaths
Lastly, if you make these Easy Vanilla Bean Christmas Lights Cookies, be sure to leave a comment and/or give this recipe a rating! Above all, I love to hear from you guys and always do my best to respond to each and every comment. And of course, if you do make this recipe, don’t forget to tag me on Instagram! Looking through the photos of recipes you all have made is my favorite!
Nutritional information is only an estimate. The accuracy of the nutritional information for any recipe on this site is not guaranteed.

As Seen In


HI, can we use coffee liquor instead of hazelnut? Excited to make these in the next few days!
Hi Mari,
Sure, that would be yummy! Please let me know if you give the recipe a try, I hope you love it! xTieghan
Hey where does the hazelnut liquor go?
Hi Fay,
If using the hazelnut liquor, you will add that in step 3. I hope you love this recipe, happy holidays! xTieghan
I just made the dough and it’s in the fridge for four hours. Do you ice the cookies when they are warm or once they’ve cooled?
Hi Stephanie,
You will want to wait until the cookies are cooled before icing them. Please let me know how they turn out! Happy Holidays! xTieghan
I cannot wait to make these with my toddler this week! Can the dough be made ahead of time and kept in the fridge until ready to roll out, cut and bake? Thank you so much!!
Hey Nicole,
You bet! I hope you love this recipe and happy holidays! xTieghan
Yummy, not difficult and the icing makes them look like bakery cookies. My family loved them.
Hi Kim,
Thank you so very much for giving this recipe a try, I love to hear that it was enjoyed! Happy Holidays!??
I had to add two more tablespoons of water than what the recipe originally called for- at first, it was just turning into tiny balls! More water allowed it to turn into a liquid.. not sure where I went wrong on that front. Other than that, the cookies turned out GREAT! SO light and the icing was a perfect touch.
Hey Maura,
Awesome! I am thrilled to hear that this recipe was enjoyed, thanks a lot for making it. Happy Holidays!❄️ xT
These were a big hit! So cute and festive and sooo delicious. Bit more time consuming than the cookies I usually make but well worth it, and I will definitely make them again.
Hey Aly,
Awesome! I am thrilled to hear that this recipe was enjoyed, thanks a lot for making it. Happy Holidays!❄️ xT
Where can I get this same tree cookie cutter. I love these cookies
Hi Dianne,
There is no longer for the cutter, I drew it:) xTieghan
These were so easy and fun to make, and even better to eat! I will definitely make these again. Thanks for the recipe!
Hi Katie,
Awesome! I am thrilled to hear that this recipe was enjoyed, thanks a lot for making it. Happy Holidays!❄️ xT
Made these yesterday and I’m totally obsessed with how they came out! So cute and festive. And yummy! Now I have to make another batch before Christmas because they’re already half gone lol 🙂 Definitely keeping this on my annual holiday cookie list. Thank you!!
Hi Jaime,
Awesome! I am thrilled to hear that this recipe was enjoyed, thanks a lot for making it. Happy Holidays!❄️ xT
These turned out great, my toddlers loved putting the lights on. Loved that the dough didn’t have to chill before cutting. Chilling in the freezer was nice while we cut the other pieces and resulted in no spread which always happens to me. Great recipe and fun!
Hey Michelle,
Happy Sunday!! Thanks a lot for giving this recipe a try, I am so glad to hear it was enjoyed. Happy Holidays!? xx
They turned out great. They taste amazing and look beautiful. Not too difficult and the kids love the icing. This will be part of our annual Christmas baking day.
Hey Amanda,
Happy Sunday!! Thanks a lot for giving this recipe a try, I am so glad to hear it was enjoyed. Happy Holidays!? xx
Looking forward to making these. Just wondering when you say 1 1/2 sticks of butter what that means exactly. I have a stick of butter and it’s 454g/1lb of butter. Is that one stick or two sticks?
Hi Marlene,
My sticks of butter are equal to 113 grams each. I hope this helps! Let me know if you give the recipe a try! xTieghan
Easy and delicious!!
Hey Kristen,
Happy Sunday!! Thanks a lot for giving this recipe a try, I am so glad to hear it was enjoyed. Happy Holidays!? xx
I’ve made sugar cookies all my life and have never had to put them into the freezer to sit for 15 minutes. That part is a waste of time as the cookies taste exactly the same as the ones I’ve made in the past. Also the icing is terrible! I am not a fan of this recipe it wastes a lot of time, the cookies taste just like other sugar cookies I’ve made and again the icing is terrible.
Hi Miranda,
So sorry you did not enjoy this recipe! I pop the dough in the freezer so that the cookies don’t spread too much while baking and maintain their cut out shape. Thanks for giving the recipe a try, was there something you did not like about the icing that I can help with? xTieghan
Hi, Miranda
Freezing or chilling cookie dough is never done to change the taste of cookies. It is about maintaining the shape of cookies, or to prevent over spreading. So if you don’t want pancake cookies, chilling is definitely not a waste of time. I’m sorry you felt this wasted your time and was terrible… maybe try to think of all baking as experimentation. It’s the only way to try new things and see what you like and don’t like. This way it’s never a waste of time! 🙂 Hope you have a happy holiday!
Hello. Baked off the cookies last night and they came out perfect. However I was mixing up the icing recipe and mine didn’t taste good. Is there an alternate icing recipe you could recommend for these cookies that would still allow me to decorate them? Thank you so much. I really enjoy ALL your dinner recipes too!
Hey Donna,
I am so glad these cookies turned out well for you! Was there anything you adjusted in the icing recipe or some way that I can help? Here are a few other recipes:
https://www.halfbakedharvest.com/the-santa-clause-cookies/
https://www.halfbakedharvest.com/chai-spiced-santa-cookies/
https://www.halfbakedharvest.com/eggnog-scented-sugar-cookies-with-easy-vanilla-icing/
Please let me know if you have any other questions! xTieghan