Next Post
Salted Caramel Pretzel Snickerdoodles.
This post may contain affiliate links, please see our privacy policy for details.
These homemade Cheddar Pierogies with Caramelized Onions and Bacon are the perfect meal to make with family and friends. Simple potato-filled Pierogi dumplings tossed in a nutty, buttery pan sauce and topped with crispy caramelized onions, sharp cheddar cheese, and bacon. Every bite is a little cheesy, a touch buttery, and full of creamy potatoes layered with delicious caramelized onions and salty bacon. Nothing is better…or cozier…on a cold winter night.

I could not be more excited about this recipe. Pierogies are one of those foods that bring back all the best memories. Tell me you all grew up eating Mrs. T’s cheddar Pierogies too? The frozen bags of Mrs. T’s were always stocked in our freezer. My mom would make them for the two of us on cold winter days. Yes, way back when my family still lived in Cleveland. Of course, back then, my mom would simply boil up the frozen pierogies, top each with a handful of cheddar cheese, and then melt the cheese in the microwave. And then?
We’d proceed to eat them by the fire…
We also did this with top Ramen (another tried and true favorite). Mom and I really knew how to live it up on bitter cold Cleveland days. It was literally a three-step, two-ingredient meal, but I loved it. So much so that when I got a little older, my best friend and I would come home from school and do the very same thing. And yes, I got her hooked on pierogies as well.
When I first started cooking for the family, I remember one long summer spent up at Mt. Hood. It was the first summer (of many) that we spent there, and I recall it doing nothing but rain. It was cold and I was bored. So bored. So what did I do? I taught myself how to make homemade pierogies. From that day on I knew I could never go back to Mrs. T’s…nothing beats a homemade pierogi.
SO GOOD.
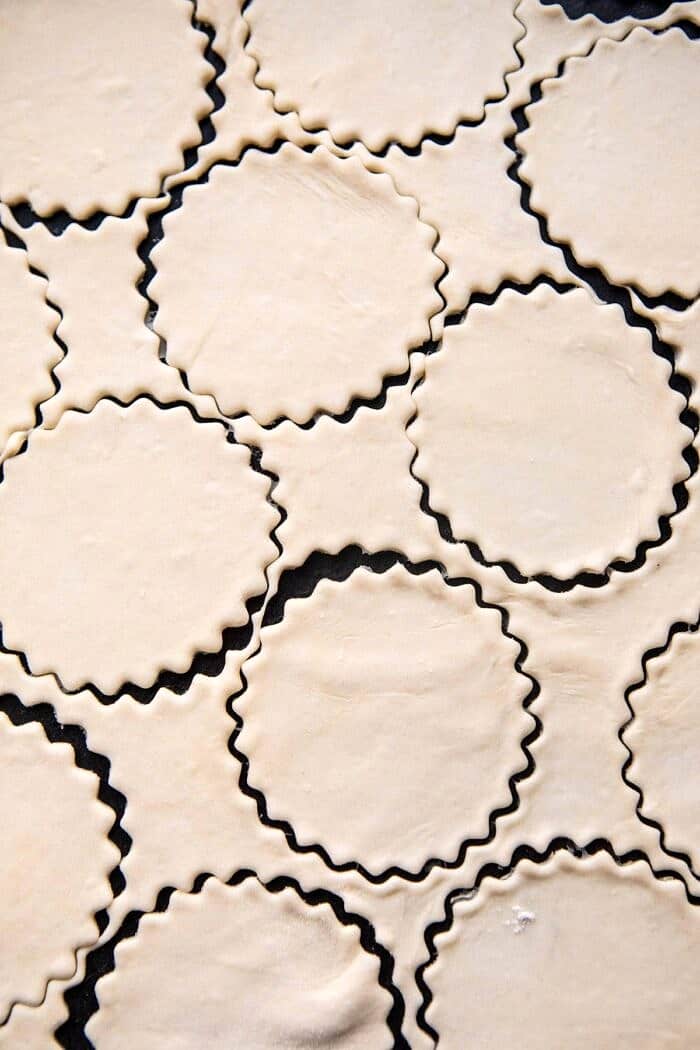
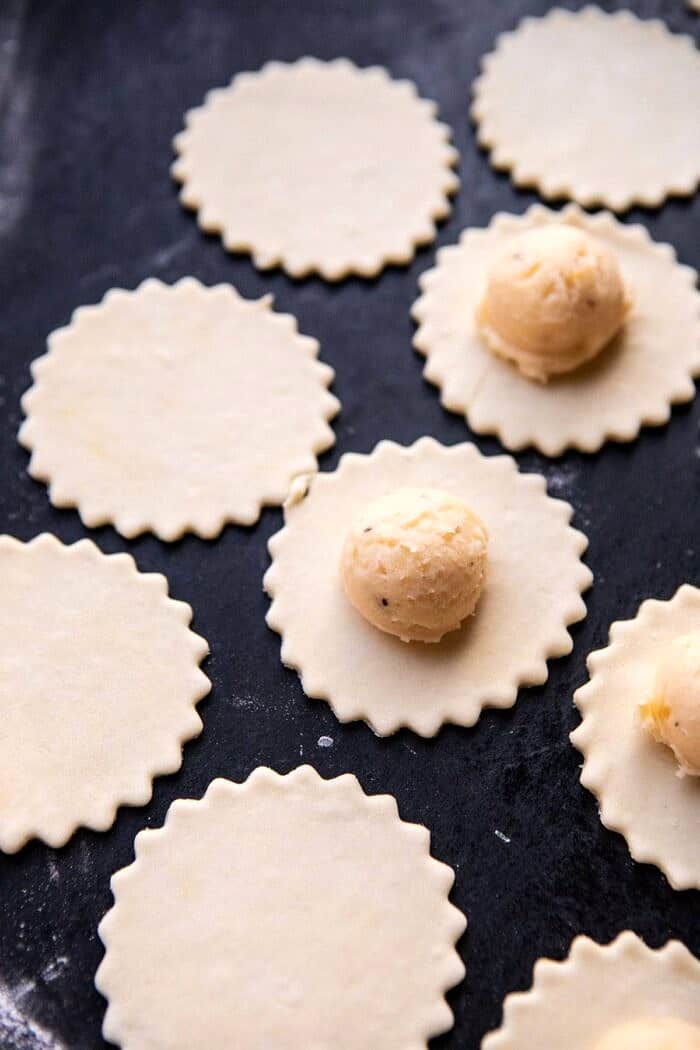
Once I discovered how to make homemade pierogies, I’d make a HUGE batch and freeze them. My younger brother Kai says that to this day, pierogies are still one of his favorite meals I’ve made him.
It’s been ages since I last made pierogies (over two years…see my first pierogi recipe here). A couple weeks ago I found myself really wanting to make a more classic pierogi. One topped with onions and cream…and bacon too.
Enter today’s recipe…and it’s probably my favorite recipe of the week.

Start with the dough. It’s your basic, flour, egg, salt, combo, but what’s unique about most pierogi recipes is the use of sour cream in the dough. The sour cream keeps the dough moist and adds the slightest tang. Since I don’t cook with sour cream, I always use plain greek yogurt instead, which works perfectly. However, you can certainly use an equal amount of sour cream if you prefer.
Next, the filling…cheesy, creamy, buttery potatoes, simple as that. Don’t mess with it, so good.
You can make the potatoes the traditional way on the stove-top, or you can use the instant pot. I prefer to use the instant pot. It’s the easiest, quickest way to make potatoes.

I’ve had a lot of people message me in the past to tell me about all the different ways they top their pierogies. But what I believe to be most classic are onions with a dollop of sour cream. Or even just butter and a dollop of sour cream. I’m not 100% sure (because I googled this and multiple answers came up), BUT I do think these are semi-classic toppings. Either way, they’re DELICIOUS.
Next up, crisp up some bacon. You can use the same skillet used to caramelize the onions with a touch of apple cider vinegar for a bit of tang. Finish with some fresh thyme. Now, toss in the pierogies and serve each serving with addition cheddar and a dollop of cream. I like to use more yogurt, but use what you love most. These cheddar pierogies with caramelized onions and bacon are going to be good no matter what.

Here’s the thing about pierogi making. Just like ravioli, these take time. Please do not let this scare you away. Making pierogies is very simple. The dough is incredibly easy to work with. If you can roll out a basic bread dough, you can certainly make pierogies. You don’t need any special equipment, just a bowl, a spoon, and a rolling pin. And if you don’t have a rolling pin – use a wine bottle.
So, while making pierogies does take a little effort, you can make them in bulk over the weekend…or whenever you have time. Then just freeze what’s left over for the quickest, easiest lunch or dinner…any day of the week. Once the pierogies are frozen, simply boil them up from frozen, they take just minutes to cook.
And yes, these are far better than Mrs. T’s.

Find some time this week, over the weekend, or maybe even over Christmas break. You can even gather up some friends and make it a holiday Pierogi Night. Everyone can help in making the pierogies. Enjoy some fun drinks, maybe a cheese board too, and of course…Christmas music!
Sounds to me like the perfect way to spend a cold December night!

If you make these Cheddar Pierogies with Caramelized Onions and Bacon, be sure to leave a comment and/or give this recipe a rating! Above all, I love to hear from you guys and always do my best to respond to each and every comment. And of course, if you do make this recipe, don’t forget to tag me on Instagram! Looking through the photos of recipes you all have made is my favorite!
Nutritional information is only an estimate. The accuracy of the nutritional information for any recipe on this site is not guaranteed.

These were a lot of work but worth every effort. Next time I’ll have a mini rolling pin handy so after I’ve cut the 3″ circle I can expand each circle to make it easier to get the filling in and close easily. Will also make another 1/2 recipe of dough for the extra filling. My family went bonkers for these with the caramelized onions…yum.
Hey Alison,
Happy Monday!! Thanks a bunch for trying this recipe out, I love to hear that it was enjoyed! xT
Hello! Can the pierogis be placed directly into a frying pan with butter and onions or do you have to freeze and boil them first?
Hi Melissa,
You do not need to freeze them, but you do need to boil them in step 5. Please let me know if you have any other questions, I hope you love this recipe! xx
Hi! What can I use to substitute the yogurt in the dough?
Hey Annie,
Sour cream will also work well for you! I hope this recipe turns out amazing, please let me know if you give it a try! xx
We gave it a try and it turned out great!
Awesome!!
Hi Tieghan,
When I was little my mother use to make pierogi’s. She was polish. I had some a while ago that had cabbage & sauerkraut. Not sure if any potatoes were in it.
I’ve never made pierogi’s but I want to now.
Thank you for the recipe.
Happy Holidays 🦃🎄
Diana
Thanks so much for sharing Diana!! Let me know if you give this recipe a try, I hope you love it! xx
I made the dough with a different filling (made from sunchokes, roasted garlic, and cheddar). They were tasty but only made 26, and I definitely rolled the dough to 1/8 inch, using sized rubber bands on my rolling pin, so recommend rolling it thinner to make the stated number.
Hey Lyndsey,
Happy Sunday!! I truly appreciate you giving this a try and sharing your feedback, so glad it was enjoyed:) xx
Would dry thyme work in the butter sauce instead of fresh?
Dried*
Hey Christina,
Totally, that would be just fine for you to do! I hope this recipe turns out well, please let me know if you give it a try! xx
This recipe was fantastic! I made it with my boyfriend who came to visit, and we had such a nice time cooking together and listening to The Smiths in the kitchen. I only made two potatoes instead of four, but still ended up with a lot of leftover filling, so we smeared it on toast with some extra bacon for breakfast the next morning. Loved it!
Hi Kris,
Happy Labor Day! Thanks so much for making this recipe and sharing your feedback! So glad it was enjoyed:)
Super yummy!!! The perfect comfort food? next time I think I’ll double the butter onion sauce next time. Can’t wait to make more of these for fall!
Hey Tay,
Amazing!! I love to hear that this recipe was a winner, thanks a bunch for trying it out:)
This recipe is absolutely incredible! It took some time and a lot of cleanup but it was SOOOO worth it. I have a “foodie” husband and three little kids, and this was really enjoyed by all. The dough recipe really is what did it for me. I normally don’t have success with dumpling type recipes with fillings because they normally come open while boiling. This one was extremely elastic and easy to work with. Will definitely be making again! I do have to say, 3 lbs of potatoes is WAYY too much, but I’m not mad about the leftovers. If you just want to make potatoes for the filling, I’d stick with the 4 russets as the recipe says.
Hey Rachel,
Amazing!! Thanks so much for making this recipe, I am so excited it was enjoyed! Hope you’re having a great weekend! xx
Although it is a little bit of work, it is so worth it. I love being able to freeze, and have something easy my kids can prepare themselves! Even without the bacon, (my daughter is a vegetarian), these are still so good! The apple cider vinegar really adds such a great touch of flavor. I always end up with way more of the potato mixture than needed, so we just have mashed potatoes; win-win.
Hey Cindy,
Fantastic!! I love to hear that this recipe was a winner, thanks for trying it out! I hope you had a great holiday weekend!?
What is the white sauce/cheese you used I. The picture? Looks delicious ?
Hi there,
That is the onion butter sauce listed in the recipe:) Please let me know if you have any other questions! xTieghan
Made these last night, and we loved them, One thing, for folks like me who follow new recipes exactly…. I had so much filling left ( not a bad thing). But why say 4 Russett potatoes and clarify that it should be 3 pounds total? I had to add a lot more to equal 3 pounds of potatoes. I made sure to roll the dough thin enough, even using my pasta machine. If I used too many potatoes, then the potato:cheese ratio was off too. Just wondering what your thoughts were on this or if anyone else had this experience.
Hi Susan,
Thanks for giving the recipe a try and sharing your feedback! I used 4 russet potatoes for this recipe, but I had a lot of readers asking how many pounds that would be, so it should be about 3 pounds. If you were adding a whole lot more potatoes than I would have just stuck with the 4 potatoes you started with. Hopefully this helps for next time! xx
My high school son said…”Why have you never made these before?” Winner on a blustery day. The time it takes to make just equals love.
Hey Heather,
Awesome!! Thanks so much for sharing your feedback, I love to hear that this recipe was enjoyed! xx
Hi Tieghan,
I was wondering if the dough can be made ahead of time and kept in the fridge until ready to use? Would/does that affect the outcome at all?
Appreciate the help!
Thank you,
Nick
Hey Nick,
That will be totally fine to do! Please let me know if you give the recipe a try, I hope you love it! xTieghan
These were fantastic! A definite make again in our household! Definitely not a quick dish to make but it’s a perfect one when it’s -30C and too cold to be outside! Thanks for sharing the recipe!
Hi Melanie,
Happy Sunday! Thanks a lot for making this recipe, I love to hear that it was a winner! xxTieghan