Next Post
This post may contain affiliate links, please see our privacy policy for details.
We kind of like bread over here. Especially sourdough bread bowls with soup.
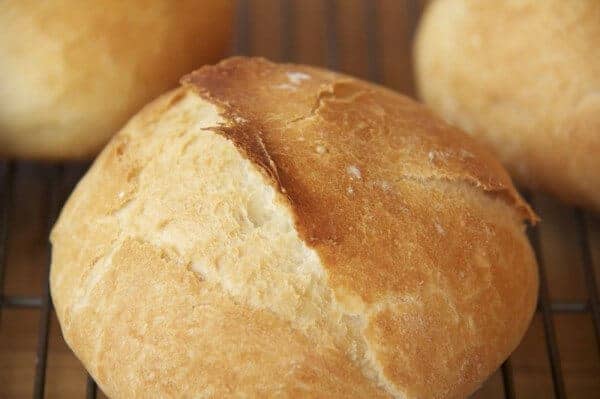
Most people do. Crusty, flavorful bread hot out of the oven with a smear of butter or dunked in soup, creamy soup.

If you have never attempted to make your own bread then I urge you to start now! Nothing beats fresh homemade bread being passed around at the dinner table. Everyone loves it and you will feel a sense of accomplishment when everyone is in awe that you could make such delicious bread. Trust me, you will get major points for this!

Sourdough bread however takes some time. Nothing about it is difficult or time intensive though. You see, to achieve its sour flavor you will need something called a sourdough starter. This is basically just flour, water, yeast, and a little sugar. It needs sit at room temperature for 3 to 5 days to develop it’s flavor. After this it needs to be refrigerated. It can then be used to make any sourdough breads your heart desires.
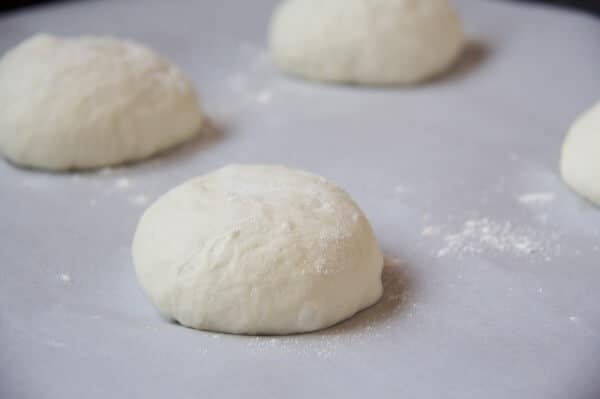
I have been looking for the prefect sourdough bread that, wait for it, is actually sour! There are two important factors to making this bread great! One is to give the dough proper time to develop its sour flavor. I know you might be anxious to eat it, but it will be worth the wait. DO NOT SKIP any of the resting and rising steps.
Two is a dutch oven. Most people have one. Honestly, I bake all my bread inside my dutch oven with the lid on. It traps the heat and mimics that of a stone oven. It creates the most amazing crusty, holey bread! Seriously, if you do not have one you should probably think about investing in one. You will use it ALL the time, not just for bread.

I like to shape my bread into bowls which can then be used as a bowl or as personal loaves for dinner. You can also shape the dough into two medium size loaves. You don’t need to use all the bread it can be baked and then frozen. Or you can freeze the dough and then bake when needed. I froze half the dough and am excited to have it in the freezer for when the urge strikes!

I do not think the family will eat soup out of anything else again! Like Panera, but BETTER!

It is Sunday so here is this week menu:
Monday
Cincinnati Chili Lasagna
Tuesday
Cranberry Chicken Puffs
Wednesday
Chicken and Broccoli Cobbler
Thursday
Beef + Fish Tacos
Homemade Taco Shells
Friday
Butternut Squash Ravioli
Ciabatta Bread
Saturday
Cheese Fondue with
Grilled Streak and Chicken, Cubed Bread, Veggies
Sunday
French Onion Soup
Lastly, if you make these sourdough bread bowls, be sure to leave a comment and/or give this recipe a rating! Above all, I love to hear from you guys and always do my best to respond to each and every comment. And of course, if you do make this recipe, don’t forget to tag me on Instagram! Looking through the photos of recipes you all have made is my favorite!
Sourdough Starter
Servings: 4 loaves
Calories Per Serving: 270 kcal
Nutritional information is only an estimate. The accuracy of the nutritional information for any recipe on this site is not guaranteed.
Ingredients
- 2 cups warm water
- 1 tbsp . sugar or honey
- 1 tbsp . active dry yeast
- 2 cups unbleached all-purpose flour
Instructions
- Pour the water into a 2-quart glass or ceramic jar or bowl. Stir in the sugar or honey to dissolve. Stir in the yeast.
- Gradually whisk in the flour. Cover loosely with a clean kitchen towel or dishcloth (not plastic wrap) and place it in a warm area. (My kitchen in the winter definitely has no warm location, but my starter was just fine.)
- Let it develop 2-5 days, stirring once a day due to the separation that will occur. When bubbling has subsided and a sour aroma has developed, stir once more and refrigerate until ready to use.
- Storing and Maintaining Your Starter
- Once your starter is stored away in the refrigerator, it only needs to be replenished once every two weeks or so. I put a little note to myself in my calendar as a reminder to either bake with or feed my starter. You should feed your starter each time you remove a portion for use in baking, but if it has been two weeks and you don’t intend to bake with it immediately, simply remove a cup of the starter and discard. For every 1 cup of starter removed, replace with 1 cup of flour and ½ cup of water. Stir to blend, and let sit at room temperature for at least 12 hours before returning to the refrigerator.
Sourdough Bread Bowls
Servings: 8 Bowls or 2 Loaves
Calories Per Serving: 360 kcal
Nutritional information is only an estimate. The accuracy of the nutritional information for any recipe on this site is not guaranteed.
Ingredients
- For the sponge:
- 1 cup fed sourdough starter
- 1 1/2 cups lukewarm water
- 3 cups all-purpose flour
- For the dough:
- 1 tablespoon granulated sugar
- 2 1/4 teaspoons salt
- 2 cups bread flour
- 1 tbsp . water optional
- To finish:
- 1 tbsp egg white lightly beaten with 1 tbsp water
- water in a spray bottle
Instructions
- In a large mixing bowl or the bowl of an electric mixer, combine the starter, water, and all-purpose flour. Mix together with a fork or wooden spoon until smooth. Cover with plastic wrap and let sit at room temperature for 4 hours.
- Transfer the bowl to the refrigerator and chill overnight, at least 12 hours.
- Remove the bowl from the refrigerator and add the sugar, salt, and bread flour to the sponge. Mix until a ball of dough begins to come together. If some of the dry ingredients will not incorporate into the dough, add the additional 1 tablespoon of water to moisten them. Continue kneading the dough (on low speed if using an electric mixer) until the dough is smooth and elastic, about 5-6 minutes. Form the dough into a ball and transfer to a large lightly oiled bowl, turning the dough once to coat in the oil. Cover with plastic wrap and let rise in a warm spot until doubled in volume, 3-4 hours.
- Line a baking sheet with a silicone baking mat or parchment paper. Transfer the dough ball to a lightly floured work surface and gently deflate the dough. Divide the dough into eight equal portions. Form each piece of dough into a ball, and tuck any loose edges or seams underneath. Place seam-side down on the prepared baking sheet. Repeat shaping with the other 7 pieces of the dough. Transfer the shaped boules to the prepared baking sheet. Cover loosely with lightly oiled plastic wrap. Let rise in a warm place until nearly doubled in volume, about 2-3 hours.
- Place a baking stone or large dutch oben in the oven and preheat the oven to 425? F. Allow the pot to preheat for at least 20 minutes. Just before baking, lightly slash the top of each boule using a sharp serrated knife. Brush the exposed surface of the loaves with the egg wash. Spray the loaves lightly with water. Slide the entire baking sheet onto the baking stone or carefully place 4 boules in the dutch oven with the top on. Bake about 28-32 minutes, rotating the pan halfway through baking, until the crust is golden brown. If baking with the dutch oven repeat once the first four have been baked. Transfer the finished boules to a wire rack and let cool at least 30 minutes before slicing and serving.
Notes
*The dough can be shaped into two loaves. Once the dough is read to be shaped divide it into two equal portions. Working with one piece of the dough, press gently into a rough rectangular shape. Make an indentation along the length of the dough with an outstretched hand. Press the thumb of one hand along the indentation while pulling the upper edge of the dough down over the hand to enclose the thumb. Tightly roll the dough towards you while forming into a rough torpedo shape, about 6 x 8 inches. If there is a seam, pinch it shut. Place seam-side down on the prepared baking sheet. Repeat shaping with the other half of the dough. Transfer the shaped loaves to the prepared baking sheet. Cover loosely with lightly oiled plastic wrap. Let rise in a warm place until nearly doubled in volume, about 2-3 hours. Bake as directed. *Using a baking stone of dutch oven is what creates this amazing crust. If you have a dutch oven please use it! If not this bread can still be baked using a baking sheet. I am not sure how the crust will turn out. *To Freeze The Dough: Let dough complete all it risings. Shape into a ball and place in a freezer bag. Freeze. When ready to use defrost. When defrost shape into a loaf or boule and allow to rise until doubled in size. Bake as directed. To Freeze the Baked Bread: Allow the bread to cool completely wrap well and freeze. When ready to eat defrost on the counter for an hour or two. Reheat in a 350 degree oven until heated through.
Adapted from Annie.

So about that soup…It is soo good. Can’t wait to tell you about it.


I have made this bread so many times and I love it. Thank you for the recipe!
Question: can the dough be placed in the fridge after the first rise? Then bake it the next day?
Hey Cristina,
Happy Sunday!! Thanks a lot for making this recipe so often, I’m so glad to hear it is always a hit! Yes, that would work well for you! xT
A success on my first time! Overall I am happy with my results. I baked the bowls in 3 in Dutch ovens and the rest on a cookie sheet. The differences were very obvious and the Dutch oven won. I made the bread but did not get around to making soup but that it okay because I was tinkering and this was a lot of fun and I will make them again–and with soup too. This was a labor of love as I started my started weeks ago.
Hey Dixie,
Awesome!! So glad to hear this recipe turned out well for you, thanks a lot for making it! xT
Hi! I just tried this recipe for starter for the first time. Almost immediately after mixing and covering it, it started to bubble and grow. Within the hour, it was overflowing out of the jar. After some time it eventually went back to original size. Is this normal? Is it supposed to grow that quickly? A lot of other recipes I’ve seen don’t use active yeast and they slowly grow. So wondering if the active yeast is what made it grow so quickly?
Can I use the sourdough starter before I put it in the refrigerator? Or does it need a feed before I use it?
Hi Jordan,
You are going to want to give it 2-5 days and then you can use it:) Please let me know if you have any other questions! xT
For the sponge- does the starter need to be fed before using? I started my starter on Monday and am so excited to use it for a fresh loaf this weekend!