Next Post
One Pot Spicy Pesto Cheese Baked Rigatoni.
This post may contain affiliate links, please see our privacy policy for details.
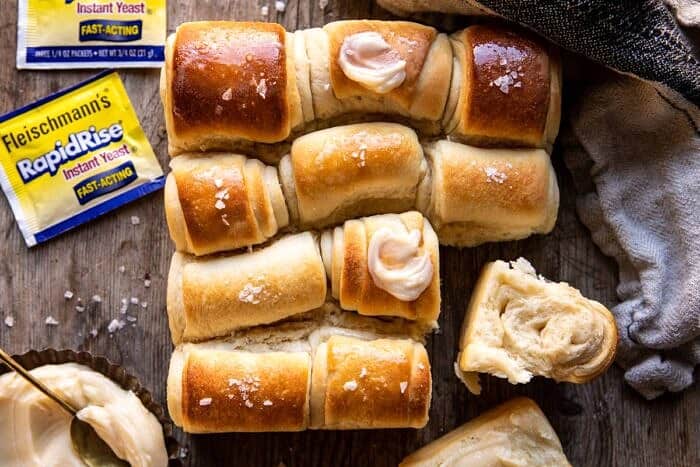
These Salted Honey Butter Parker House Rolls are light, airy, buttery, perfectly salted, and SO delicious. Serve them warm right out of the oven with homemade honey butter for a dinner roll that’s melt in your mouth good. Incredibly quick and easy to make and uses just six everyday staple ingredients. It doesn’t get easier or tastier than that! These are the perfect rolls for all of your upcoming holiday dinners…Thanksgiving included!
This post is sponsored by Fleischmann’s®.

If there’s one thing that my mom really passed on to me it’s a love of soft, buttery dinner rolls. She’d make a point most Sunday nights to bake fresh bread for the family dinner. Just like dessert, mom would often have the bread ready to go before dinner was even a thought. That’s just how she does it, carbs and chocolate. Everything else was secondary. And for that, I love her even more.
Seeing as we both share a love for good bread, you can imagine that it’s a very important item on our Thanksgiving table. And that’s where these Parker House Rolls come into play. These rolls are on my 2019 menu. They are some of the BEST rolls to come out of my kitchen. They’re simple, but yet have “special touches” that make them worthy of any holiday table.
My two secrets? Salted butter and sweet honey butter.
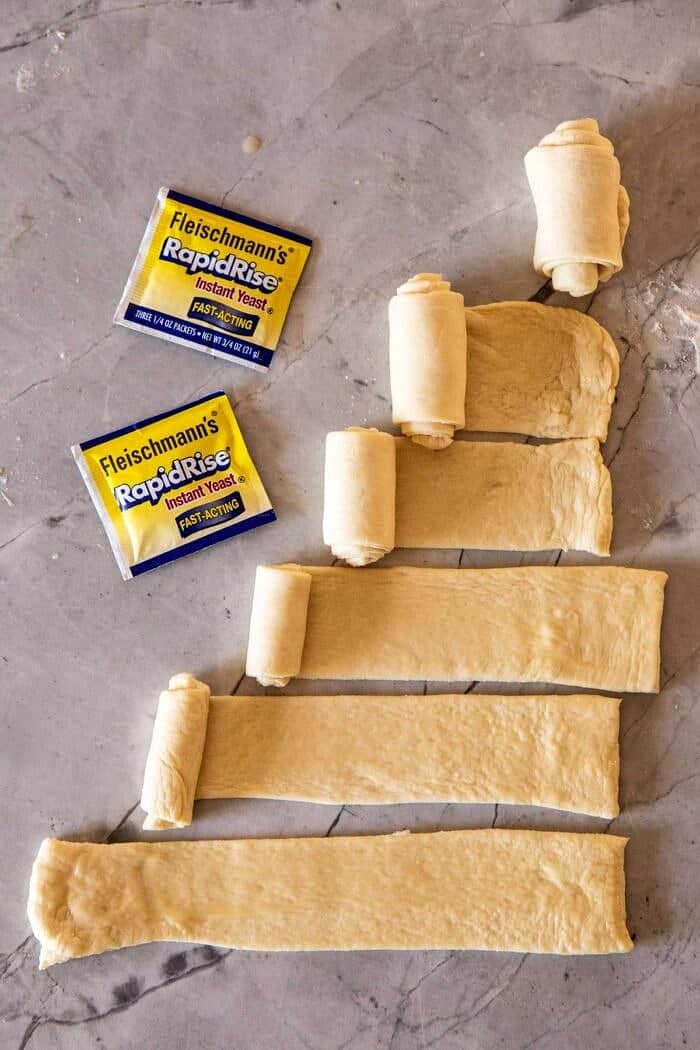
The story is that Parker House Rolls were created by the Parker House in Boston. It was one of the great nineteenth-century hostelries. As you can imagine, the rolls have been copied by just about every cookbook author and baker that’s out there…myself now included. There are a lot of variations, but classic Parker House Rolls should be light, soft, and a touch sweet.
The dough is traditionally shaped into a folded over roll, but these days there are many ways in which to do it! I ended up rolling mine into coils for a fun, pretty touch.
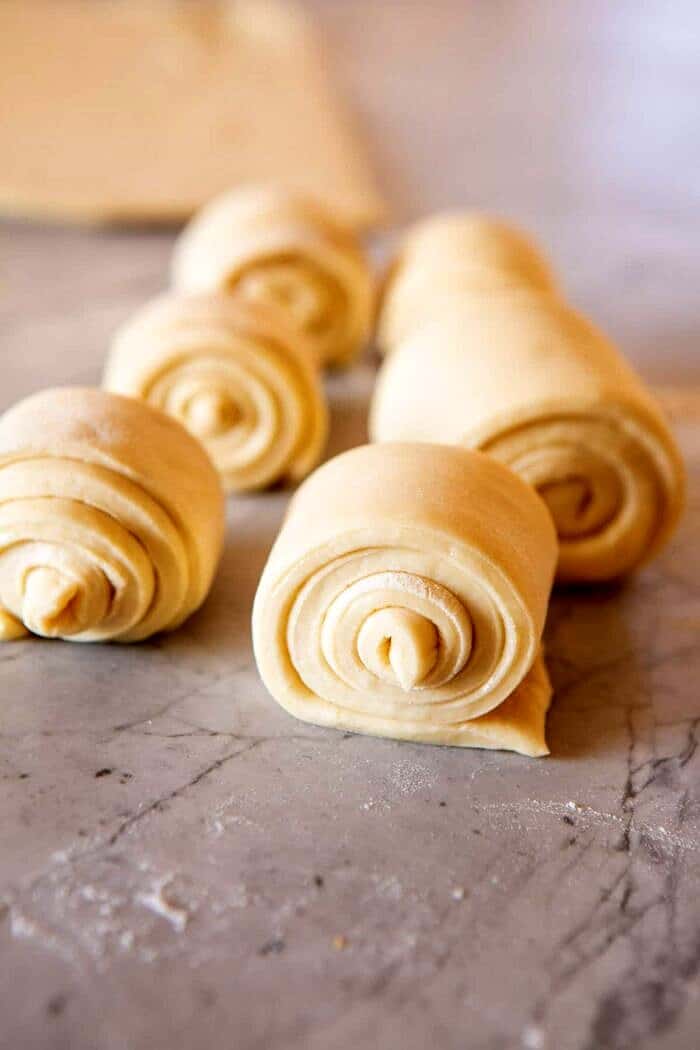
As you can tell, my recipe is a little different than the classic. I’m using honey in place of sugar and salted butter. Two simple ingredients that make ALL the difference.
For the dough, simply mix flour with Fleischmann’s® Rapid Rise Yeast, and a pinch of salt. Add warm milk, a touch of honey, and salted butter. Mix until smooth, let the dough rest for ten to fifteen minutes, and then it’s time to shape the rolls. And that’s the beauty of Fleischmann’s® RapidRise® yeast! We get to skip an entire hour-long rise. Yes, please!
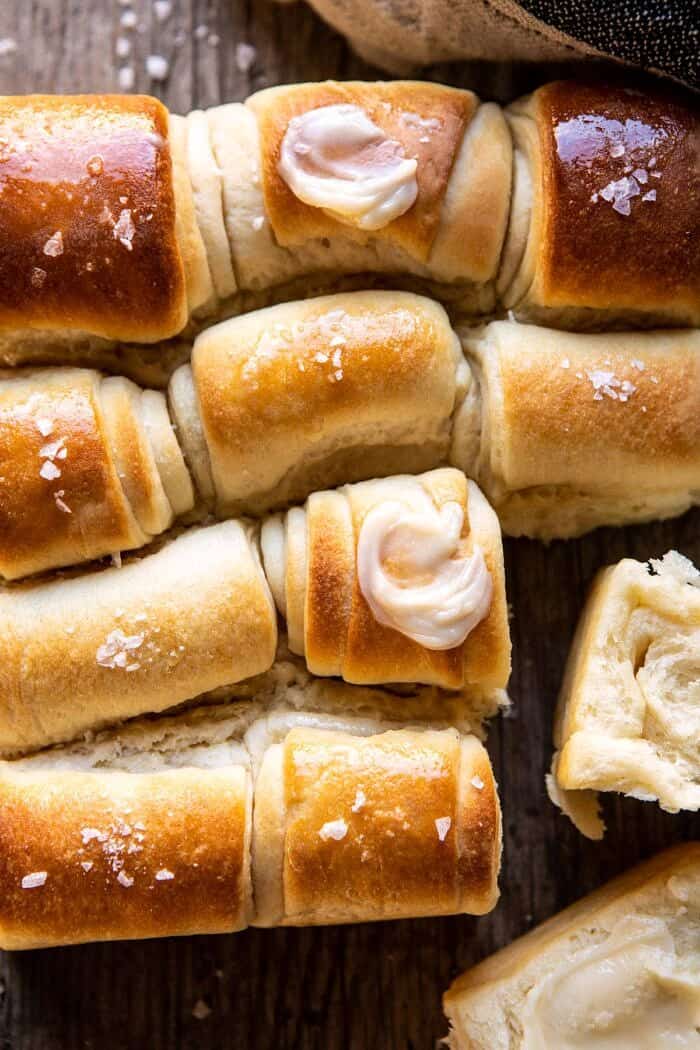
Shaping the rolls is easy. If you’ve made a cinnamon roll, you can make these Parker House Rolls.
To keep it simple, just take strips of dough and roll them up into a tight coil. I have a bunch of photos to help you guys visually with what your rolls should look like. Once you complete one roll, you will quickly get the hang of the process.
When all the rolls have been shaped and arranged in a baking dish, cover the dish and let the rolls rise until puffy, about twenty to thirty minutes. Then bake! Minutes later your kitchen will be smelling like glorious home-baked bread.

Of course, me being me, I had to include a little honey butter. You all know it’s my favorite and I cannot think of a better butter to pair with these soft rolls. The sweetness from the honey is mouth-watering on a warm, fresh out of the oven roll.
Especially when topped with a sprinkle of flaky sea salt as well.
What I love most about these rolls is that you really can’t mess them up. The dough and process are so easy and very forgiving. Trust me, if you’re fearful of making bread, start with this recipe. It’s SO GOOD every time.
And yes, you should make these for Thanksgiving. They’re perfect for soaking up all that gravy and then eating for breakfast the next morning. There’s nothing not to love.
Again, soft, buttery, perfectly sweet, and just a touch salty. What every dinner roll should aspire to be!
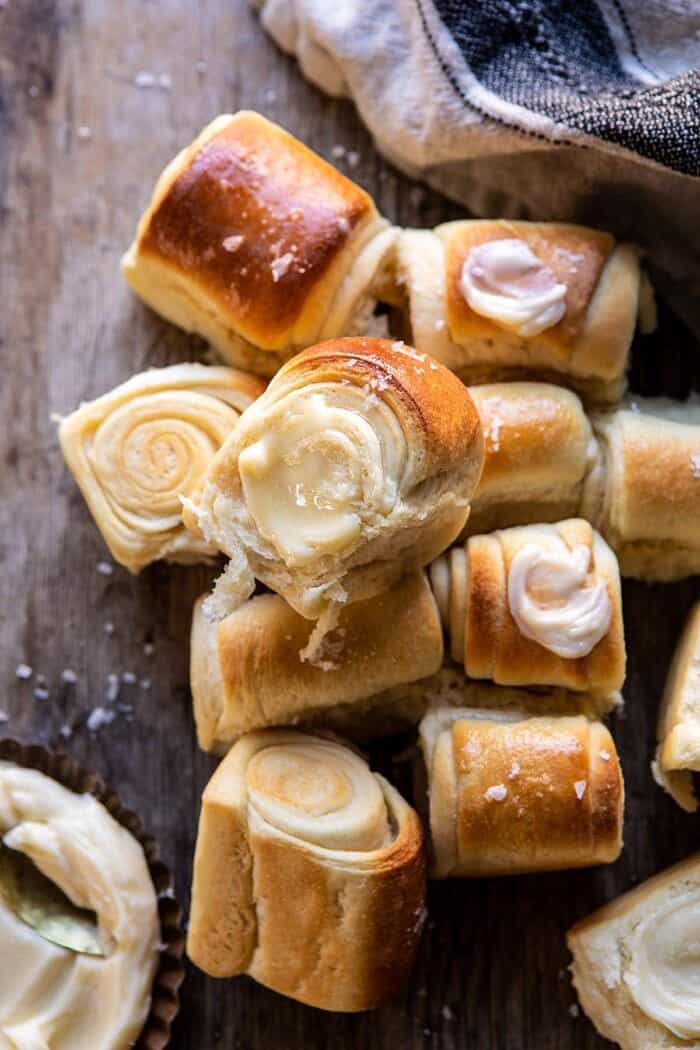
If you make these salted honey butter parker house rolls, be sure to leave a comment and/or give this recipe a rating! Above all, I love to hear from you guys and always do my best to respond to each and every comment. And of course, if you do make this recipe, don’t forget to tag me on Instagram! Looking through the photos of recipes you all have made is my favorite!
Nutritional information is only an estimate. The accuracy of the nutritional information for any recipe on this site is not guaranteed.
{This post is sponsored by Fleischmann’s®. Thank you for supporting the brands that keep Half Baked Harvest cooking!}
I make these every year and they turn out perfect! So yummy and so easy to make with little wait to rise time. Thank you!~
Hey Krysten,
Wonderful!! I love to hear that you enjoyed this recipe! Thanks so much for your feedback and trying the recipe! Happy Thanksgiving! xT
I rarely leave reviews, but felt obligated to for this one.
Not worth making 😕
I expect a certain amount of variance between the ideal of the recipe and the reality of my kitchen…but usually, that’s a minute or two extra on the cook time, a little more flour in the yeast dough, or needing to turn my oven light on and let my dough rise in its gentle warmth.
This recipe turned my patience and wasted my ingredients.
Also, whatever you do, *don’t* use the option to convert to metric. It won’t turn out.
I greatly prefer to bake using metic measures, so I happily used the option to convert to metric when I printed the recipe. Hard nope. I tossed the first batch of dough, as the conversion to metric meant I had far too much flour and not enough liquid, to the point it wasn’t worth salvaging. Note to recipe bloggers – if you have a conversion option, check it with every recipe before you publish, and make certain that it converts correctly…
I tried again, using the standard measures.
Simple recipe, but nothing exciting. Made to spec (no changes to recipe), and the end result was meh, and nowhere close to the times listed in the recipe.
It took around 25 mins with my Kitchenaid Professional 600 stand mixer, using the dough hook on power level 3 and 4, before the dough came together and required 3 tbsp of flour over the starting measure (within the extra 1/4 cup mentioned in the recipe). Cook time was well over the “18 – 25 mins at 350°” listed in the instructions; at 22 mins I had to cover the rolls with foil, and the inside was raw. I have an oven thermometer that I use to monitor the temp, as ovens do vary. My oven temp ranged between 342° and 350° (well within normal), and the total cook time to done was 38 mins.
The end result was…indifferent. The roll itself had no flavor, only that granted by the honey butter. It was tender enough, but boring. Given the variance between the recipe norms (“4 to 5 mins with the dough hook”) and the reality, I won’t be making this again.
Hi Ann,
I appreciate you making this recipe and sharing your very detailed notes. I am so sorry this did not turn out for you. Unfortunately, the flour metric measurement was incorrect. Our calculator is controlled by Google and it interpreted the measurement wrong. The metric measurement for the flour is now correct. Again, so very sorry this happened! Happy Thanksgiving! xx
Hi Tieghan
Happy Thanksgiving. I know you cook at high altitude but do you suggest any tweaks? I’ll be baking them in Breck at 10,000 ft and I remember them not turning out great last time. Thanks!
Hi Sumer,
You should be able to follow this recipe as written without any issues:) What happened last time? Let me know how I can help! xT
The conversion from US to metric is broken on this recipe and it screwed up our recipe.
It converts 3 and a 1/4 – 3 and a 1/2 to 843.75 grams (!) when in reality 3 and a 1/4 is 406 grams and 3 and a 1/2 is 437.
The conversion added the two together instead of converting.
Please fix!
Just had that same experience tonight. Didn’t make the connection at first, wasted all the ingredients by the time I figured put the mistake…tried again with the standard measures, and although the recipe turned out, none of the times were accurate. Also, wasnt particularly tasty. Honestly, I’ve had tastier rolls from a grocery store.
Hi there,
I am so very sorry about this!! The metric conversion is automated by Google, but we just went in and fixed the flour metric measurement, so it is correct now! Again, my apologies! xx
Our family loves these rolls, for sure! My kids request them for every birthday celebration, and I’m making two batches for Thanksgiving. Just curious…is there a way to make them with sourdough starter instead? Wanted to maybe experiment with that but wasn’t sure about ratios. I’m guessing a bulk rise would be needed? Just curious!
Hey Jami,
Happy Sunday!! Thanks so much for giving this recipe a try, I appreciate you making it and your feedback! So sorry, I have never used sourdough starter with this recipe before! x
Ive made these for the past 2 thanksgivings for my family and they are OBSESSED! I had to make two batches last year lol. Wondering how to make these dairy free for my poor brother that is lactose intolerant watching us all devour these in bliss?! Thank you Teigan for another amazing recipe!
Hi Karina,
I love to hear that your family has been enjoying this recipe! So sorry, I have never made them dairy free before, but you could certainly try using his favorite dairy free swaps to see how they turn out! xx
I’ve substituted oat milk in most baking recipes with no problems, Cakes, breads (both yeast and quick), pancakes, etc. I suggest getting one that says extra creamy (or something similar), those tend to be closest to milk consistency. Sometimes they are a little more watery than regular milk so just keep an eye on how your dough is looking and add a little at a time of flour and liquids. As with any bread recipe you might have to add more or less flour. And there’s lots of dairy free butters you can use.
i just pregamed this recipe in anticipation for thanksgiving and oh my goodness….it is going to be so hard not to bake these on the weekly!!! excellent recipe!
Hey Karen,
I appreciate you giving this dish a try and sharing your feedback! Love to hear that it was a winner:) x
Can these be made by using King Arthur GF flour?
Hi Lindsey,
Yes, I haven’t tested it myself, but I know it has worked well for other readers! I hope you love this recipe! xT
Anyway to make a dairy-free version? My daughter is nursing and needs to be dairy-free this year.
Hi Hope,
So sorry, I have never made these using dairy free ingredients, you could certainly give it a try though! Please let me know if I can help in any other way! xx
Hi Hope! I’ve made them successfully using almond milk instead of milk, and earth balance instead of butter. I made one batch of these for my sister in law, who is dairy free, and a regular batch with dairy for us. Honestly, the dairy free ones ended up even tastier!
My first attempt was a first attempt. Second try I used the regular yeast and proofed it and put everything in the bread maker on the dough cycle and it worked perfect. I found 12 rolls fit nicely in a square pan. Either 8×8 or 9×9, I’m not sure which mine is. I’d post a photo as requested except I can’t figure out how. I do need a little work getting them all the same size.
Hey Leigh Ann,
Happy Wednesday!! So glad to hear that you enjoyed this recipe, thanks a lot for trying it out and sharing your notes! xT
My family loves these rolls! I am making them ahead for Thanksgiving today. I want to prepare them and then put them in the freezer until the morning of. Does it matter if they rise and then freeze or should I just put the coils into the freezer right after making them?
Hi Melissa,
You can do the rising after freezing them:) Love to hear that your family enjoys this recipe! xT
I’m making these for Thanksgiving and cannot wait! 🙂 I noticed in the video it’s a square pan, and doesn’t appear to be a 9×13, which is what the recipe calls for. Is it possible to use a square pan, and if so, what size? Thanks in advance!
Hi Clarissa,
You can go ahead and follow the recipe as written using a 9×13 pan, I just halved the recipe for the video:) Please let me know if I can help in any other way! xx
Thank you! I cannot wait to try these 🙂
Question-in the video it looks like you halved the dough…does this recipe need to be halved? As in, this recipe as is would make 24 rolls not 12? Sorry if I am confused. Just wanted to make sure I am rolling the dough out correctly after watching the video.
I found a 9×12 pan was too big for 12 rolls and used a square pan. Either 8×8 or 9×9.
Thank you!
Hi! Can this recipe be doubled? Looking forward to trying them!
Hi Alison,
For best results, I would make 2 batches and then bake in 2 separate pans. I hope this helps, please let me know if you have any other questions! xx
I really want to try these. My family LOVES rolls. But, I may be one of the only people left on earth that doesn’t have a stand mixer. 🙁 Anyway these can be done by hand?
Hey Laura,
Yes, of course, just mix with a wooden spoon and knead by hand until you have a smooth dough ball. I hope you love this recipe! xx
I love this recipe and make it every holiday but I think I do something wrong because I have to use significantly more flour than the recipe calls for to make the dough not be a sticky mess. Fam loves it anyway but I would love any tips on what I am messing up!
Hi Jules,
Thanks so much for making this recipe so often! It’s hard for me to say what might be happening, but I might try letting the dough proof longer next time. I hope this helps! xT
Jules,
I had a similar experience- I think it is related to the type of flour. I first used an organic unbleached all purpose flour which used the exact amount this recipe calls for. I switched to just an unbleached all purpose flour and it took way more flour and was still stickier but I got a better end result!