Next Post
Gingery Coconut Sweet Potato and Rice Stew with Chili Oil.
This post may contain affiliate links, please see our privacy policy for details.
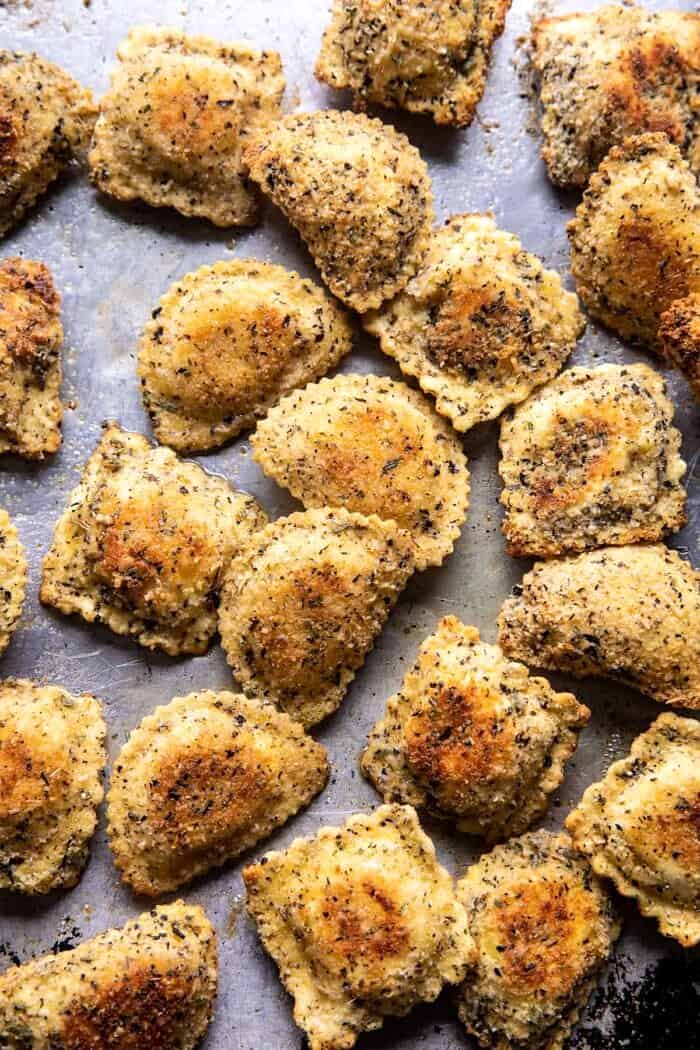
Switch up the average weeknight with these Oven Toasted Garlic Herb Cheese Ravioli. Cheese ravioli coated in garlic and parmesan herbed breadcrumbs, and oven bake until golden and toasted. Serve these crispy, cheesy bites with spicy warmed marinara sauce for the perfect easy appetizer to make from now through the holiday season. There never seems to be enough of these bites…so bake up a double batch and enjoy with family and friends.

Switching it up yet again today and serving up something new, fun, and very delicious. Everyone, say hello to our new favorite appetizer of the season…oven toasted garlic herb cheese ravioli!
I’ve been really trying to share more appetizer recipes with you guys. I’ll be the first to admit, I can get stuck in a one-track frame of mind and only share out new dinner and dessert recipes. But we all know, there are so many other fun and delicious recipes out there to be cooking up.
With the holidays drawing closer, and the fall football season in full-force, now is a good time to explore appetizer/snacks. I’m all about thinking on new dinner ideas. And I love creating a delicious dessert. But I’m having fun brainstorming “snacks” too.
Enter this ravioli. I honestly can’t remember how I landed upon this idea. I was waffling between a handful of recipes, but in the end, I’m so happy I saw this idea through.

Traditionally, this Italian recipe is deep-fried and made minus all the herbs and spices I’ve used here. However, from what I read online, this is not a recipe that originated in Italy, but instead, seems to have originated in – St. Louis!
Since I don’t love deep frying, I decided to oven bake these little bites and add flavor through the herbs and spices. And fortunately, they turned out perfect! And so much easier (plus healthier) than deep frying.

I’m not sure it gets much easier than this recipe, these are a great last-minute appetizer to serve up. All you need are cheese ravioli (bonus points if you use homemade ravioli – not needed, but extra delicious), parmesan, breadcrumbs, garlic, herbs, and spices.
All pantry staples for me! Well, not the ravioli, but I do tend to either keep homemade ravioli in the freezer or store-bought ravioli from Whole Foods in the fridge. I love to use them for quick dinners on busy nights. Plus, I get the feeling I’ll be using them even more to recreate this recipe throughout the holidays!

Start with the ravioli. As I said, homemade is amazing if you have the time, but store-bought fresh ravioli is great too. Either way, just make sure you’re using fresh ravioli, not frozen or dried. You don’t boil the ravioli before baking, so using a fresh pasta is key. My favorites usually come from the refrigerated section at my local Whole Foods or even from my grocery store. They have so many options these days, so just pick a cheese ravioli that sounds the most delicious to you.
Once you’ve got your ravioli situation all figured out, it’s time to assemble.
The breadcrumbs are the KEY. The combination of garlic, basil, oregano, thyme, sage, fennel, and crushed red pepper flakes are my favorite blend of Italian herbs and spices. Tossing this mix with parmesan and breadcrumbs is what really makes this ravioli so good. It’s fresh, herby, garlicky, and spicy. All of my favorite things…plus cheese ravioli!
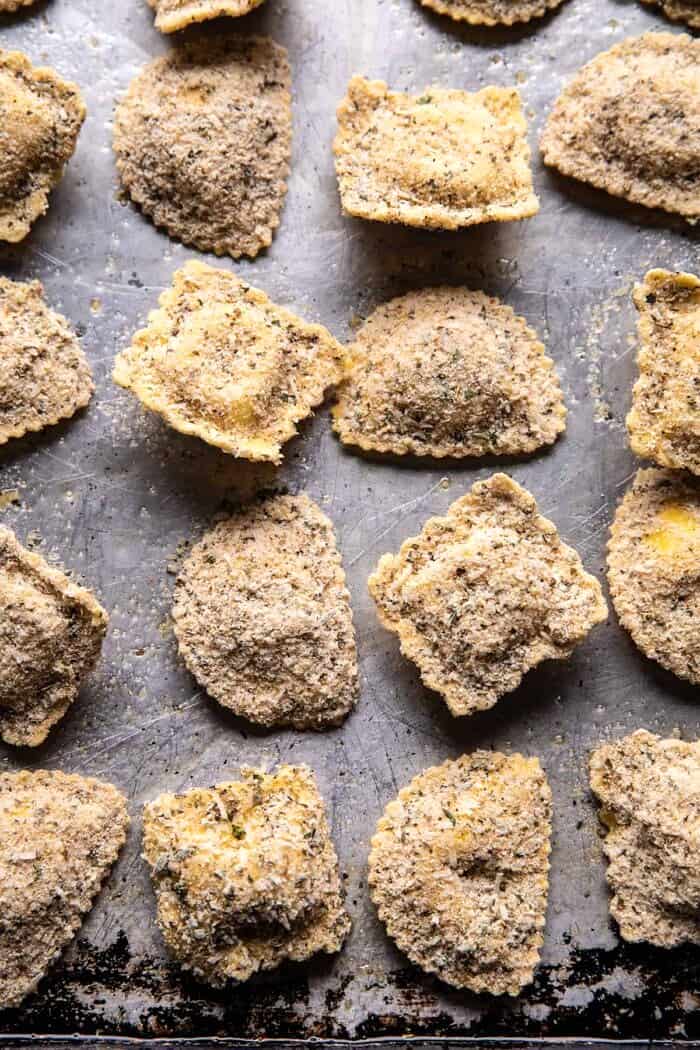
Simply dip the fresh ravioli through a beaten egg, then dredge through those crumbs. Now, drizzle each ravioli with olive oil. Then simply bake in the oven until golden, crispy, and toasted. In ten minutes you’ll have amazing ravioli to snack on.
And your kitchen will smell incredible too.
Serve these bites alongside your favorite marinara sauce, I always use Rao’s Arrabbiata Marinara. It is the best store-bought sauce! Not a single ingredient I wouldn’t use within my own homemade sauce and so delicious too.

For one, you can assemble these mini bites ahead of time, then just bake them off before you plan to serve. That said, these are definitely best served warm, right out of the oven. You want them to be perfectly crunchy outside and filled with warm cheese inside.
Two, these bites are finger foods. Think the perfect two-bite appetizer for snacking on while chatting or watching the Sunday night game.
Three, these are EASY. Completely no fuss and just darn easy. You can whip them up in just about thirty minutes. And…
And everyone loves them! I mean, how could you not? Cheese ravioli coated in seasoned garlic herb crumbs and baked. So very cheesy, herby, and just delicious!

Looking for other fall appetizers? Here are a few ideas:
Cauliflower and Cheese with Spicy Breadcrumbs
Everything Ranch Cheese and Pretzel Snack Mix
Goat Cheese Stuffed Bacon Wrapped Dates with Rosemary Honey
How to Make an Easy Holiday Cheese Board
Lastly, if you make this Oven Toasted Garlic Herb Cheese Ravioli be sure to leave a comment and/or give this recipe a rating! Above all, I love to hear from you guys and always do my best to respond to each and every comment. And of course, if you do make this recipe, don’t forget to tag me on Instagram! Looking through the photos of recipes you all have made is my favorite!
Nutritional information is only an estimate. The accuracy of the nutritional information for any recipe on this site is not guaranteed.

I made this as an appetizer, but next time I think I will make it for dinner with some salad and veggies and lots of sauce for dipping. What a hit! Everyone – teens and adults = ejoyed it and it took hardly any time to make. Thank you!
Thank you Lori!! I am so glad this recipe turned out so well for you! xTieghan
This was a five for me and my daughter. Hubby, however, didn’t like it because he thought it tasted like raw pasta. He wanted it fried, which I know is not the idea. Any suggestions for next time? Loving your website and cant wait to try more recipes!
Hey LaDonna,
Thanks for trying the recipe! Sorry I haven’t tried frying these but you certainly could. Please let me know if you have any other questions! xTieghan
Can I use panko instead of regular bread crumbs?
Hey Megan,
Yes Panko would work. I hope you love the recipe, please let me know if you have any other questions! xTieghan
Made these w Trader Joe’s Caprese
Ravioli
I let them come to room temp:)
Very delicious
Thank you so much Vickie! xTieghan
Made these for a group of 6 while we watched football. So easy and delicious! I did half plain cheese ravioli and half chicken mozzarella stuffed. The chicken ones really brought it to the next level of amazingness. Thanks for sharing!
Thank you for trying this Beth! I am really glad it turned out so well for you! xTieghan
I can’t wait to try these. Can you substitute a meat filled ravioli for the cheese filled ravioli?
Hey Lauren,
You bet! I hope you love the recipe, please let me know if you have any other questions! xTieghan
This was easy and so good. I double crusted some of them to see the difference and both ways were delish.
Love to hear that!! Thank you so much for trying this recipe, Liz! xTieghan
Hey Tieghan! These sound incredible, I’ve never found a store bought fresh ravioli that I love (Canadian groceries suck compared to American) and I’ve never tried homemade before, but these sound so good I’ll have to start making ravioli myself!
Also, I know this is unrelated but I wasn’t sure where else/how else to ask? So, I made the big bag of your dry pancake mix from super simple but I don’t know how much milk/melted butter/ egg to add to actually make pancakes out of it? It doesn’t say in the book either. So how much wet ingredients would I use if I wanted to use, say 3 cups of the dry pancake mix? Thank you!
Hey Stephanie,
Thanks so much for your kind message! You can follow the recipe on page 35 just omit the pumpkin and creme fraiche. I hope you love the recipe, please let me know if you have any other questions! xTieghan
Yum! These are one of our favorite Friday night dinners. Reminds me of when I was a child in St. Louis and would get these for dinner. I’ll have to try this recipe next time…. I’m sure the addition of the herbs would be delicious.
Aw that is awesome that this reminds you of good times! I hope it turns out amazing for you, Mikaela! xTieghan
Is the cooking time wrong or I’m missing something?
Hey Mary Ann,
The cooking time is correct. Did you try the recipe? Is there something I can help with? xTieghan
Thank you for a recipe with fresh rather than frozen ravioli! We can’t get frozen here, which is a problem when I find recipes that sound good but only work with frozen. Also, I’m a bit late to the game, but I think I may need to start from the beginning of your blog and just go through the entire thing, cuz everything I’ve tried so far has been amazing!
Wow thank you so much Kim! I am so happy you have been loving my recipes and I hope you continue to!! xTieghan
I make this but I cook them in my air fryer. Even better than baked!
Thank you Virginia! xTieghan
Looks delicious. You should correct your cook time, currently says 3 hours.
Thank you Kamie! xTieghan
This looks delicious! I’m so excited because I’ve only seen them fried. If all I have is frozen ravioli, can I thaw them and then use them for this recipe?
Hey Adrienne,
For this recipe I would highly recommend using fresh ravioli. I hope you love the recipe, please let me know if you have any other questions! xTieghan
Hi Tieghan,
Your recipe sounds lovely.
I have one question. Do I need to boil the ravioli before I bake them?
Thanks for your help.
Hey Chris,
For this recipe you are going to use fresh ravioli so you do not need to boil them. I hope you love the recipe, please let me know if you have any other questions! xTieghan