Next Post
Roasted Apple Pecan and Brie Buckwheat Waffles with Caramel Drizzle
This post may contain affiliate links, please see our privacy policy for details.
Well, I did it. I finally crossed homemade croissants off my list.

They have been on my list of things I have always wanted to make for way too many years. I always think this year at Thanksgiving I will make Croissants or this year for Christmas I will make croissants.
Never happens.
Time pretty much always gets the best of me and Croissants are not something you make if you do not have time. There is no sugar-coating it. Croissants are a labor love. Worth it? Yes, but most definitely a labor of love. Are you going to want to pull your hair out during the process? Probably, but again, still worth it……
At least once during your life time that is! Will I ever make these again? Probably, but only because I am crazy and these croissants were crazy good and I live in a family of bread lovers. So yeah, in another year or so when I have forgotten all the time and patience it took I will do it all again.
Here is the deal, they are actually very straight forward and technically not hard at all. If you make bread you can make these, but you do need time (think like the whole weekend or you know, fourteen hours or so) and patience, which I have neither of. Still kind of amazed I actually made them, but like I said I have been wanting to forever. Ok well, that and I needed some of the dough for a project.
Oh and I should mention, I made not only one batch of croissant, I actually made a total of three. Yeah, three. One for now and two to freeze and save for Thanksgiving and Christmas. I figured if I was making them, I might as well just make a ton. My cousins are coming for Christmas again this year (so excited!!) and I can guarantee we will have Thanksgiving guests too…..
Enter random kids who my brothers find on the hill. It’s just so much fun!
Not.
Anyway, I am stocked with croissants. Over fifty are sitting in my freezer right now. It’s kind of awesome.
Ok enough, let’s get on with it!
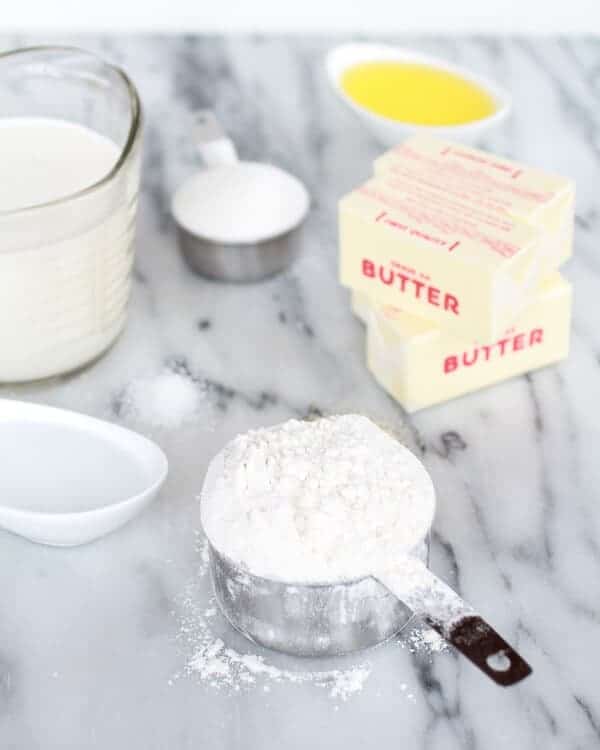
Gather your ingredients.
Start out pretty simple. Flour, cold milk, hot water, yeast, sugar, salt and lots of butter!
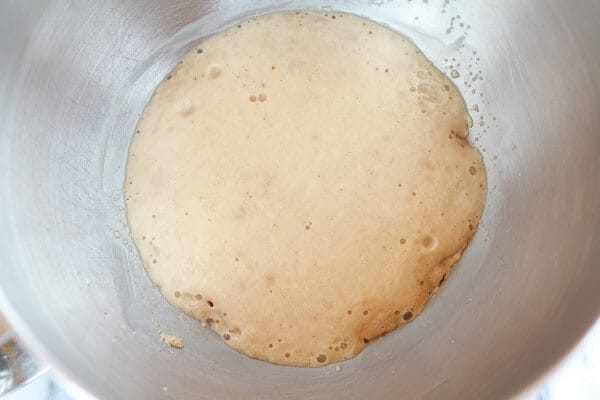
Start by activating the yeast. Combine the warm water with the sugar and yeast. Let sit for 10 minutes until foamy. It should smell bread-like.
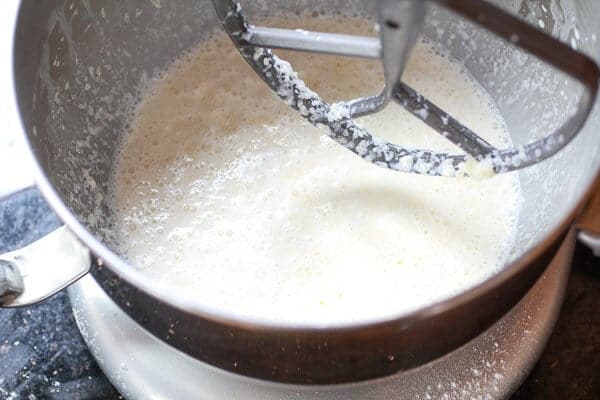
In the large bowl of a stand mixer (or in a large bowl) fitted with the paddle attachment, combine the remaining sugar, salt, melted butter, milk and the yeast mixture and mix on medium speed until combined.
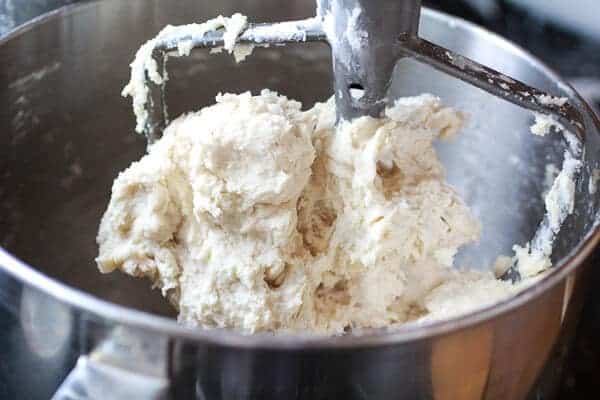
Gradually add the flour 1/2 cup at a time and mix just until the dough comes together in a sticky ball. I ended up using all five cups, but you may need less.
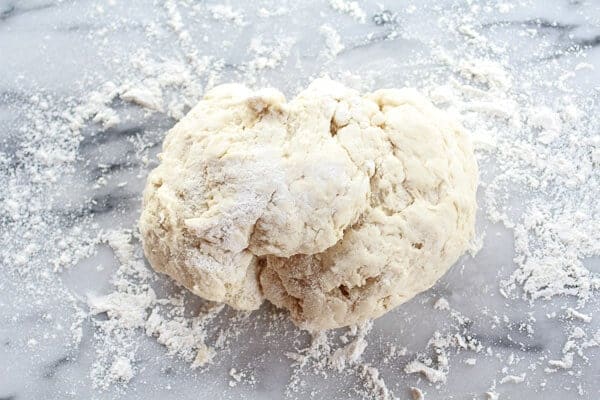
On a lightly floured surface, roll out the dough into a rectangle about 1/2 inch thick. Transfer to a large baking sheet and cover with plastic wrap. Place in the fridge until chilled, about 40 minutes.

It’s butter time…..
Also, the secret to amazing croissants and also a pain my rear.
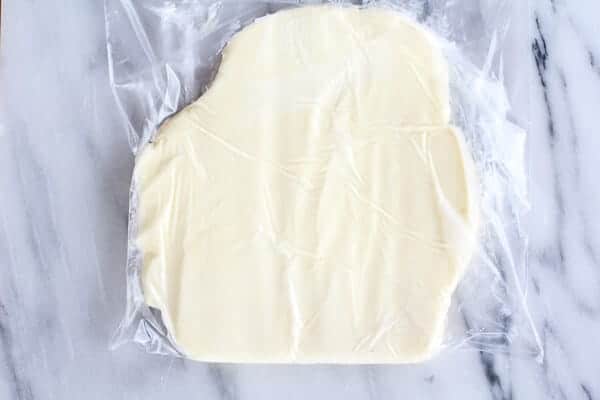
I found it was easiest to place all four sticks of butter together in a gallon size ziplock bag. Then using a rolling-pin, beat the butter on a work surface to flatten it. Continue to gently beat the butter with the rolling-pin and shape the butter into a 6-by-8-inch rectangle. This part was really kind of hard, but just keep working it.
Place the butter back in the fridge and grab the dough (after 40 minutes or so of chilling in the fridge). Now it is time to laminate the dough, which just means fold the dough with the butter to create layers. On a lightly floured work surface, roll out the dough into a 16-by-10-inch rectangle.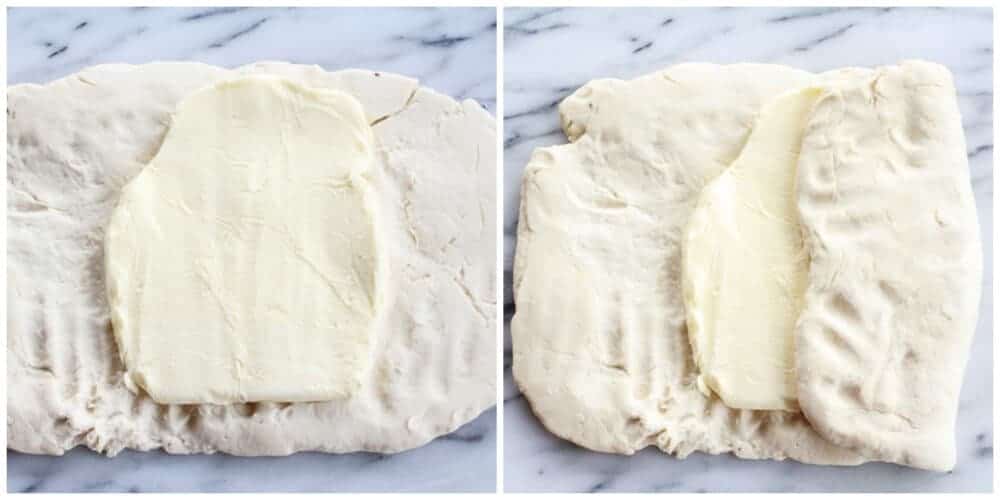
With a short side facing you, place the butter in the middle of the dough. Fold the ends up like a letter. Fold over the upper half to cover the butter and press the edges together to seal. Then fold over the remaining lower half and press the edges together to seal.
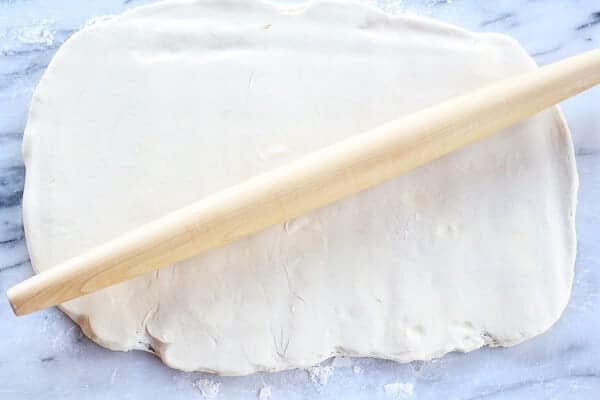
Turn dough again so the short side is facing you, and use the rolling-pin to press down equally on the dough to help flatten it. Roll dough into a 15 x 10 inch rectangle.
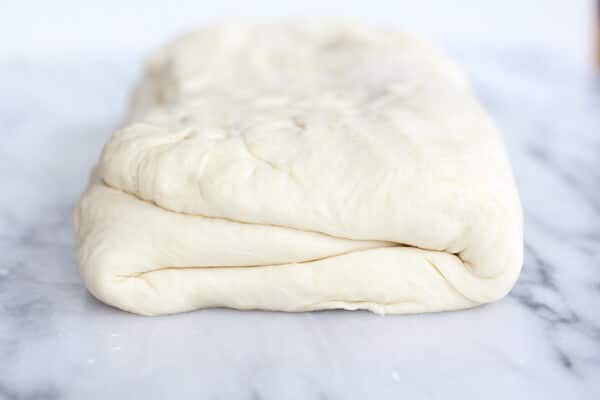
Then fold the dough like a letter again, with a short side facing you, fold the bottom third up, then fold the top third down. Use your hands to pull the dough into a rectangle shape. You should now have a roughly 11 x 6 inch rectangle. This completes the first turn. Wrap in plastic wrap and place in the fridge to chill for 45 minutes.
Return the chilled dough to the lightly floured work surface with a folded side to your left and repeat the process to make 3 more turns, rolling, folding and chilling the dough each time, for a total of 4 turns. After the final turn, refrigerate the dough for at least 4 hours or overnight (I chilled mine overnight).
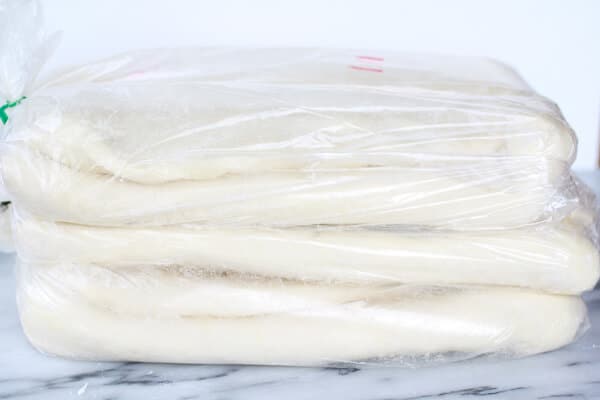
That photo above would be all three of my batches…..
What was I thinking?
In over my head.
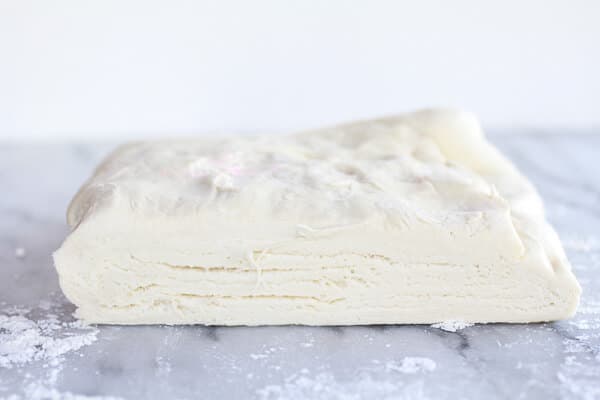
Now it’s time to form the croissants. Divide the dough in half and place one half in the fridge while working with the other half. Hopefully your dough will look like the photo above, with layers of dough and butter. If not? Pray for the best! Roll out one half of the pastry on a lightly floured work surface into a 9-by-18-inch rectangle. Using a pizza cutter or sharp knife cut the dough in half lengthwise, and then cut the dough into triangles.
Roll out one half of the pastry on a lightly floured work surface into a 9-by-18-inch rectangle. Using a pizza cutter or sharp knife cut the dough in half lengthwise, and then cut the dough into triangles. 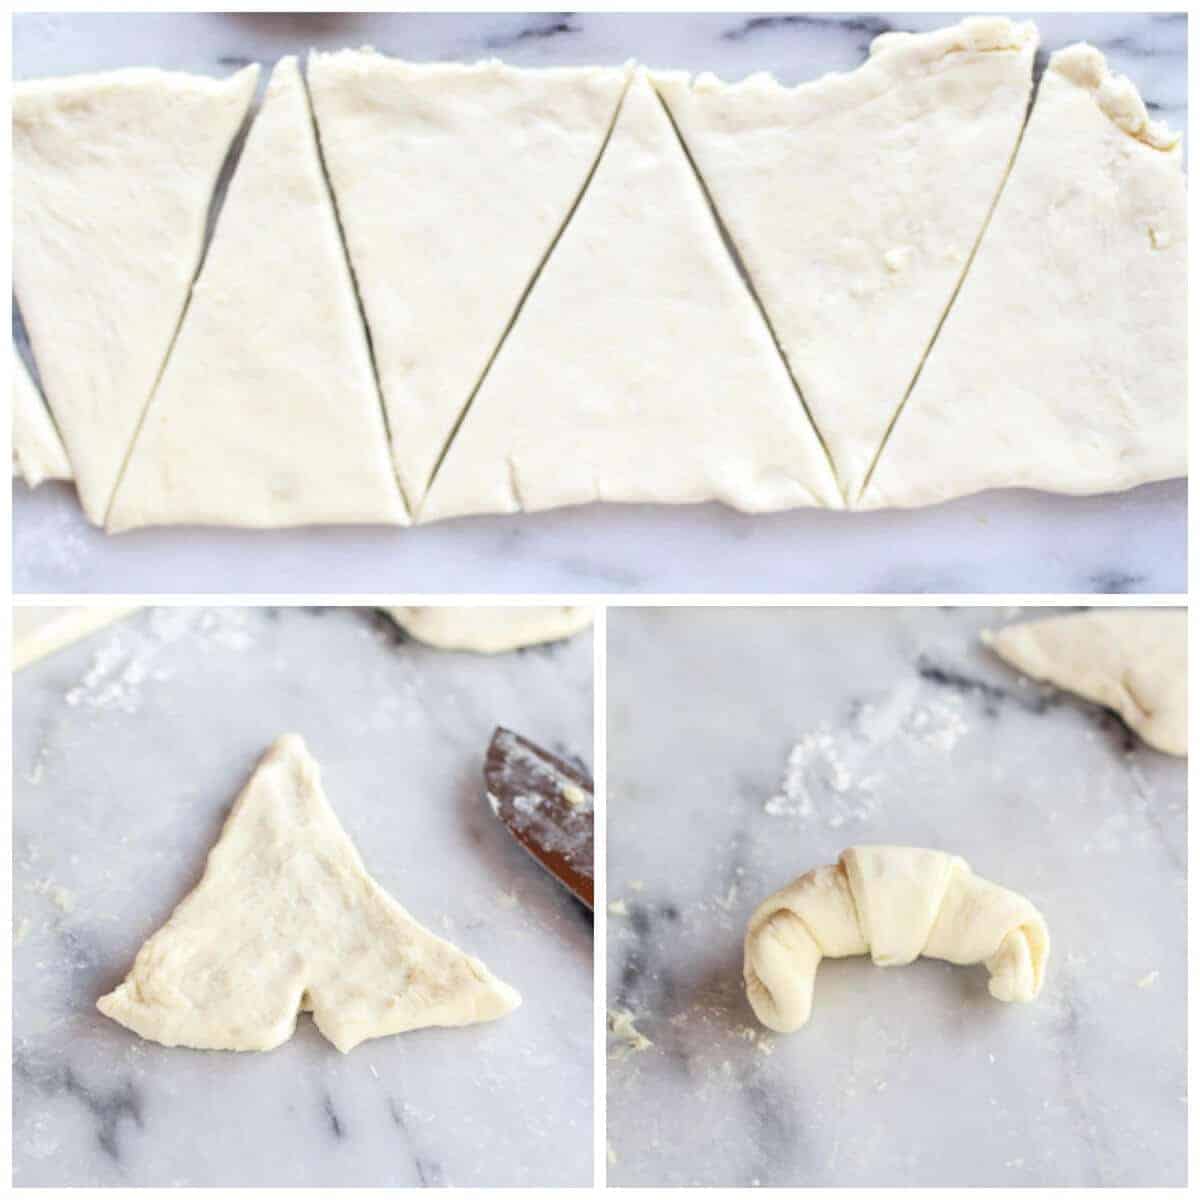
Cut a small vertical slit right into the middle of the straight end, and using both hands, roll croissant up pushing the sides out to either side. Place on a baking sheet about 2-3 inches apart, cover with a towel and set in a warm place to rise for 1-2 hours. The croissants will not double in size like other yeast doughs do. After one hour position a rack in the middle of the oven and preheat to 425 degrees
Lightly brush the tops of the pastries with the egg mixture. Bake the pastries, 1 sheet at a time, until golden brown, 15-18 minutes. Transfer to a wire rack and let cool on the pan. DEVOUR

Or, you can also stuff the croissants with fun fillings. I did chocolate, chocolate peanut butter, cinnamon sugar and cinnamon sugar pumpkin.
All so incredibly good.

And so incredibly flakey.
It’s all those layers of butter.

Perfect with a smear of thick homemade pumpkin butter (I have never had the Trader Joe’s stuff, but I think homemade is always better) or apple butter or jam or just more butter!
Or even all by themselves fresh from the oven. So good.

Or with…

Some chocolate.
Obviously, that one had to happen. As I said, I also did chocolate peanut butter and cinnamon sugar, but stupidly I only made two of each of those and they were gone the second they came out of the oven.
Killer.
The fourth one was cinnamon sugar pumpkin, the photo below. I think this one was my favorite. Perfect for fall, yes, but I just love these flavors. It was epic.
Yeah, epic.

Nutritional information is only an estimate. The accuracy of the nutritional information for any recipe on this site is not guaranteed.

So worth it.
Hey! Can I replace the milk with water and the butter with coconut oil? I need to make this for my teacher and she’s vegan! Thanks <3
Hi! I am sorry, I have never tried that, so I would recommend sticking to the recipe if possible. Thanks!
Greetings I asked a question about the above croissants before I joined … I would like to add more layers by folding a few more times ,is that alright ?
Hi! Sure! You can add more layers. Let me know if you have questions. Thank you and I hope you love these!
Question ,would I be able to add more layers of butter then several more beatings with rolling pin and additional roll outs and folds ? to make more layers in the croissants Camille Poe
can i know how many grams is 4 stick? i had make quite a nos. of times, but every time i fail. each time during rolling the butter comes out. what went wrong.
Hi Eileen! It is 452 grams. Let me know if I can help in any other way. Thanks!
I’ve made this recipie before and loved how the croissants turned out, so delicious! I decided to make them again last week, but my schedule got crazy and now the finished dough has been sitting in my fridge for about a week. Do you think it’s still okay to use, or should I start over?
Hey Kristin!! I think that dough is totally fine! Oh my gosh, do not waste it. i bet it will be delish becasue it has developed flavor!! Let me know if you have questions! 🙂
This recipe is amazing! I love everything about it! They are so flaky and delicious
So happy you like them Bella!! Thank you!
Love the step by step photos here. Did you all know that the Croissant was actually invented in Romania ? True story, and as a kid i just had to start my day with a salty croissant. Ha!
Hi Florentina! No way, I had no idea! Very cool! Thank you! ?
I actually began the process of making these croissants using another recipe but finished with yours. I live in a hot climate which makes it very difficult to work the dough without the butter melting. However like many who have commented I have wanted to make croissants for years. The dough actually sat in the fridge for a week after the third folding as I ran out of time. Still very sticky when I finally shaped them
up but I left them in the fridge overnight and baked the the following morning. Fabulous! The layers were perfect and the kitchen smelled wonderful. I’m over this hurdle so I will definitely make these again soon.
Hot temperatures can be a pain when working with croissants! so glad you got them done though!! Thank you for making them Angella!!
Hi there. Wondering what kind of yeast you used – active, rapid rise, etc. I am making these in a few weeks for Thanksgiving and can’t wait – my first attempt at croissants! Thanks for the great instructions.
Morreen
A few days ago, I made your other recipe for crescent rolls; and they were delicious and flaky. Thank you for that recipe!
This recipe also looks like it would be delicious, but don’t know if I want all that butter. So, I think I will stick with your other recipe but add a little more sugar.
Love your site, I’m glad I discovered it. 🙂
well I took a huge leap of faith in ability today, trying to make these layers of goodness. Started this process at 9 am and finally at 3 pm I got a chance to taste my patience. Well the laminating was tedious and frustrating. Some of the butter broke through the layers while I was rolling. I stayed focus to my goal and at 3 pm. I tasted my hard work. They were flakey and my house smells like a cafe in France. ( I have never gone to France, I guess that s how it should smell like) The taste was amazing!!!! I put some nutella in some of them. Love your blog!!!!!!! 5 for 5!!!!
I’ve tried a couple of croissant recipes before and always felt disheartened by the results but your recipe was the first one that turned out so well for me! They were a big hit! I found it easier to pound the butter out with my rolling pin when I went to laminate the dough, it broke it up very easily (and gets out a lot of frustration!)
In comparing your recipe with my previous attempts, I was wondering why you chose to melt the butter that goes into the dough?
YAY!! This makes me so happy! Thanks so much for making them and letting me know the results!
As for the butter, I can’t really remember my exact thoughts on this, but I have a feeling I attempted to soften it in the microwave and ended up melting it. ha!! Let me know if you have any other questions, happy to help! 🙂
I’ve read that you have to use butter that is at least 82% fat, which is kinda difficult to find. Did you use any particular butter? I’m wondering if I can get away with normal butter from the grocer store. I think it’s about 80% fat. Thanks!
Hey Rachael,
I just use regular butter and it works great!
Absolutely delicious, thank you. Mine were not as fluffy looking at yours but that will make me try it again!!
So just to make sure I am reading this right. After each turn I should put them back in the fridge for 45 mins correct?
Correct, hope you love them!!